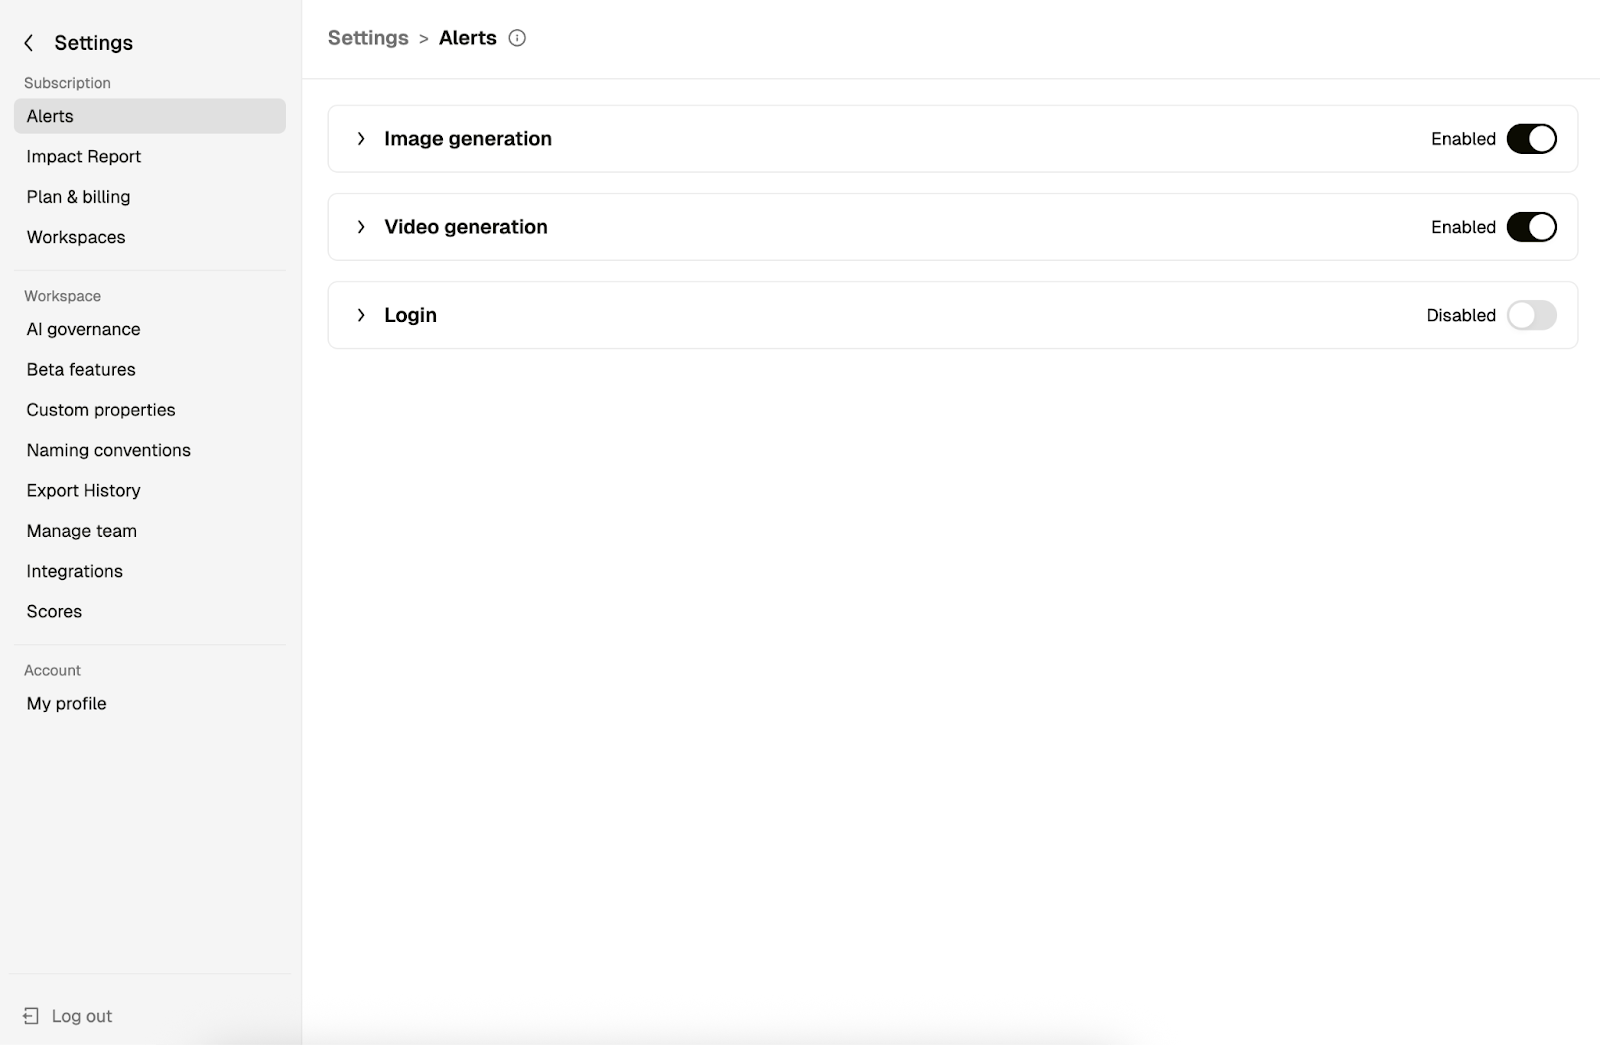
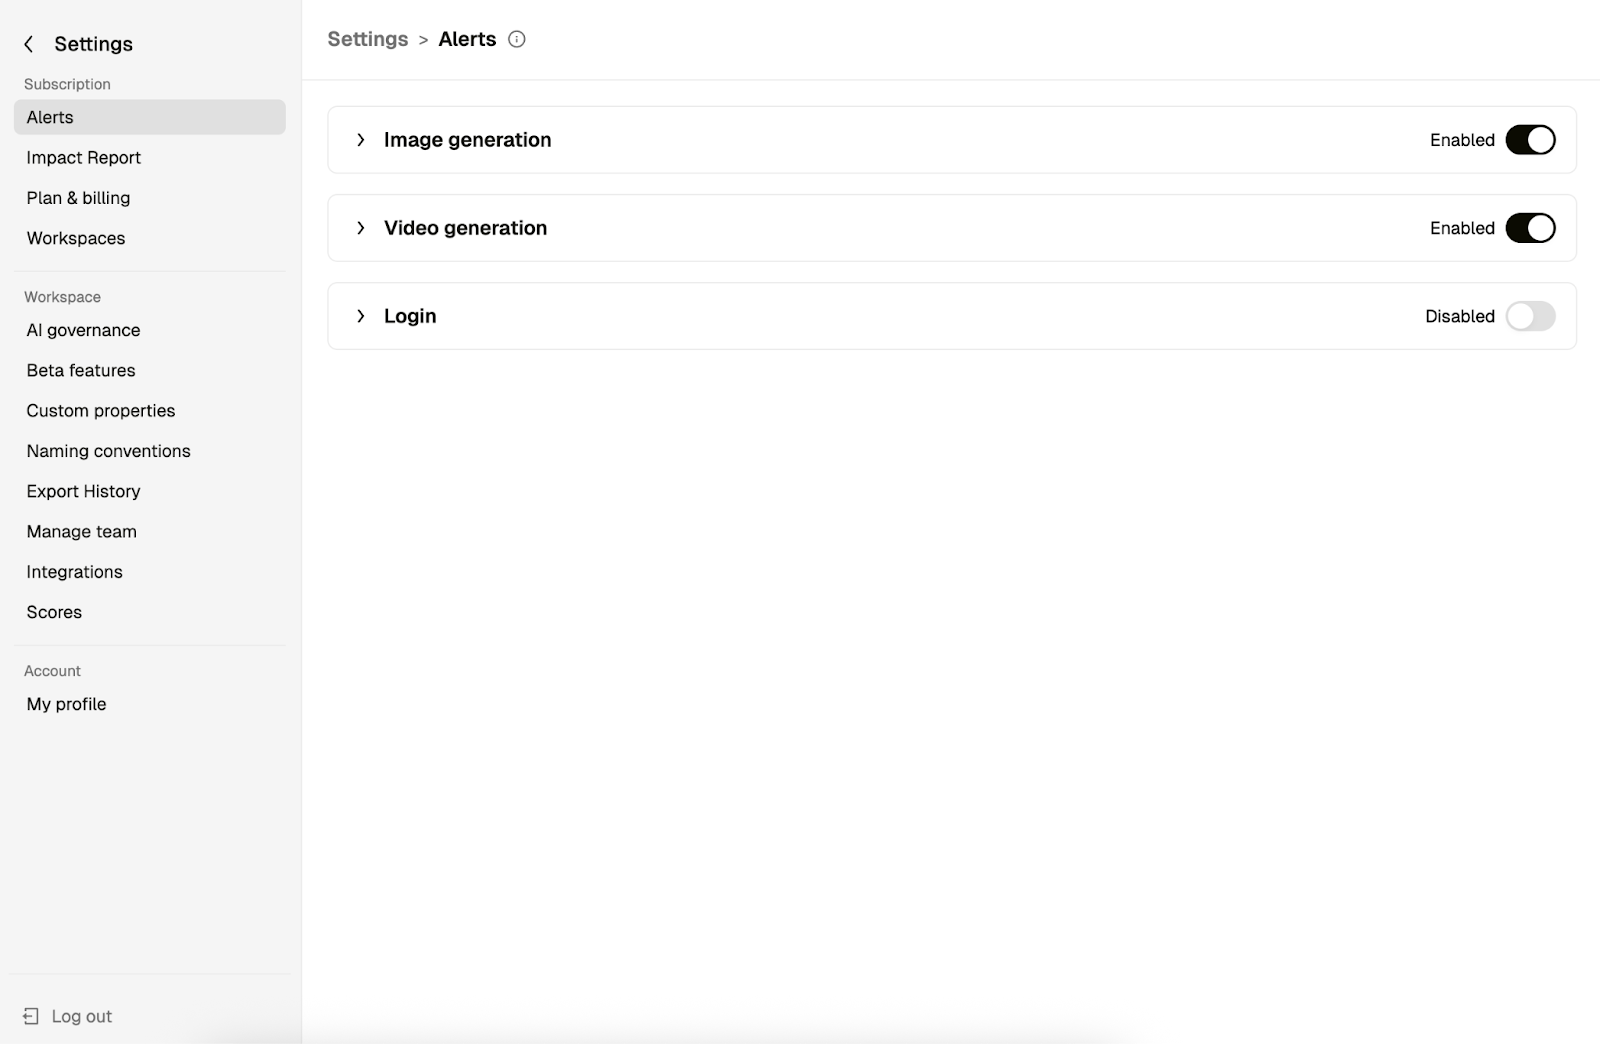
We’ve redesigned the entire settings experience to make it easier to manage Pencil at scale. Previously, all settings lived in a single popup, which made it difficult to understand hierarchy, scope, and impact.
With this update, settings are now organized into a dedicated Settings page with clear separation between subscription, workspace, and account settings—giving admins and users more control, clarity, and consistency across organizations with multiple workspaces.
What’s New
A Dedicated Settings Page with Clear Hierarchy where settings are grouped into three sections:
Subscription settings
Top-level controls for billing, workspace setup, alerts, and impact report. Functionally the same as before, but now easier to find and manage.
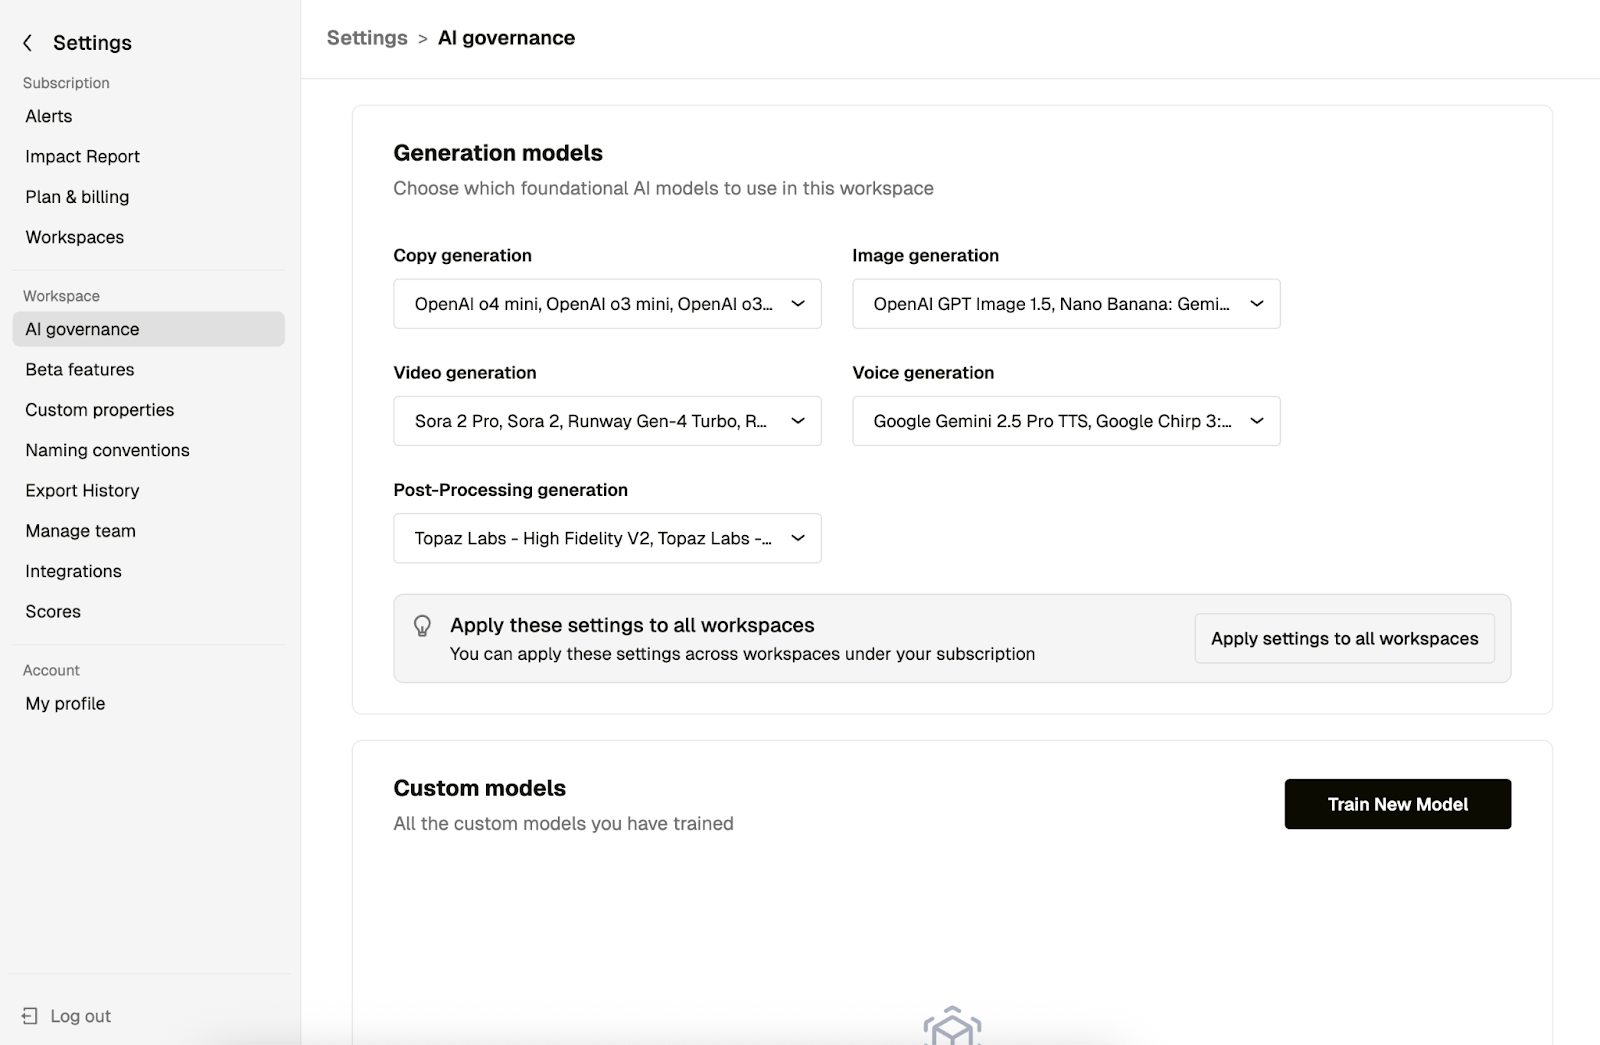
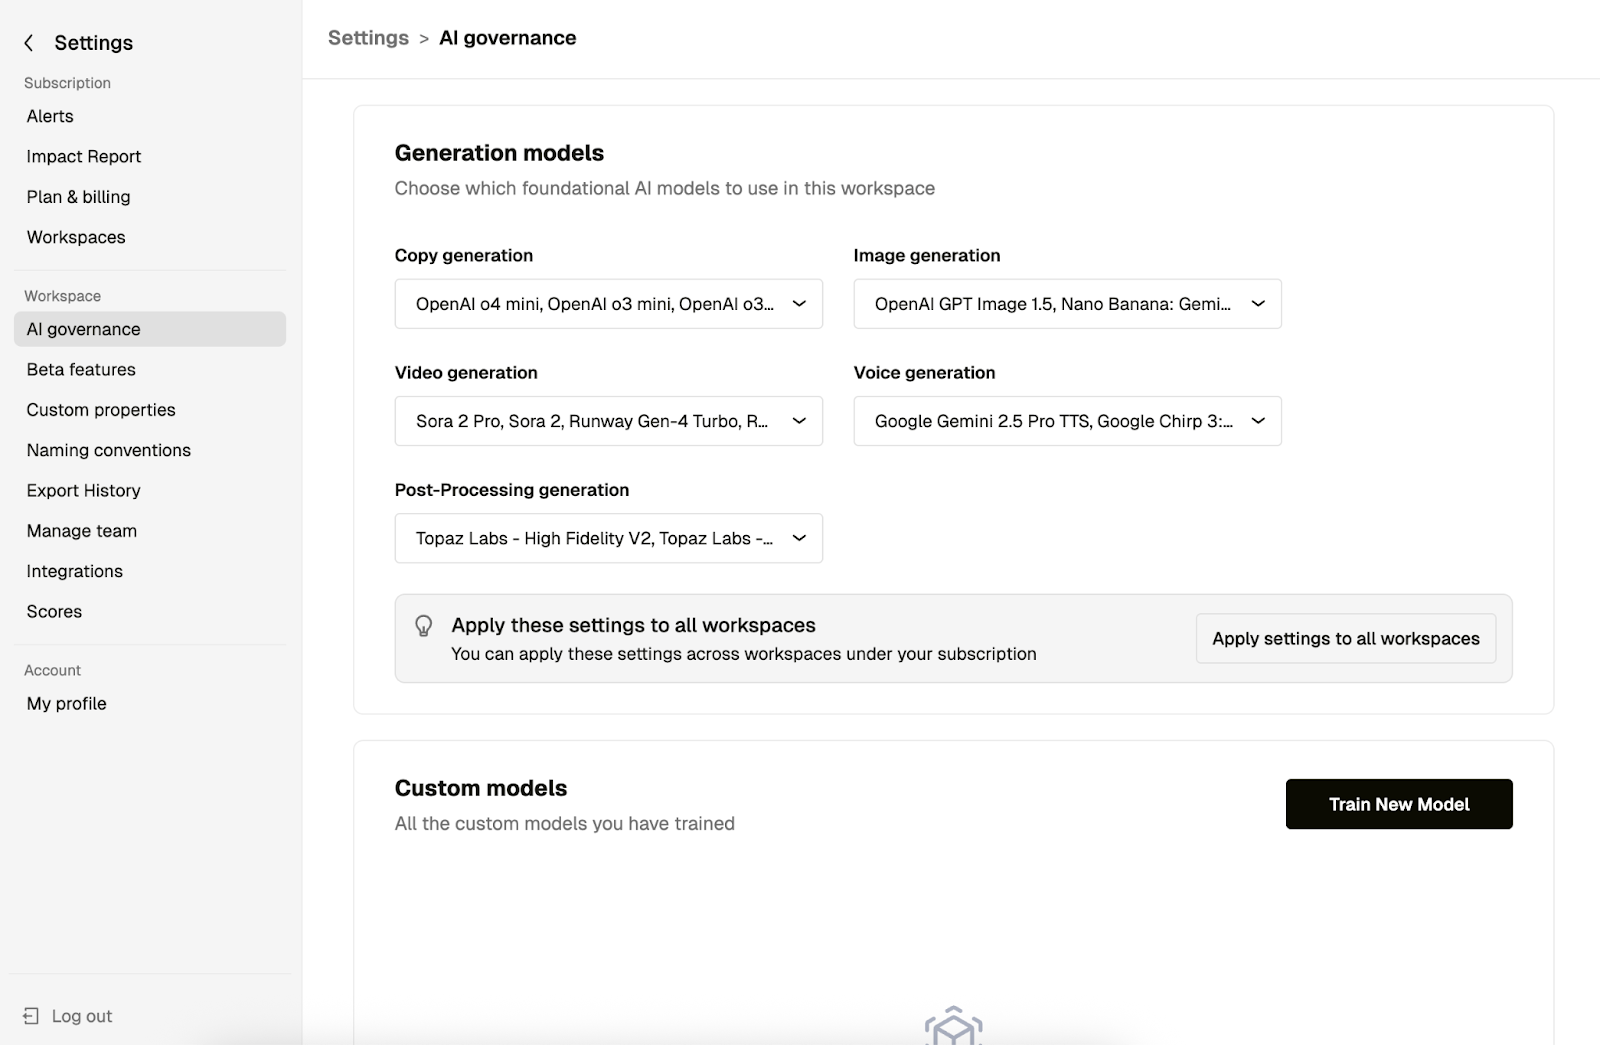
Workspace settings
Controls that apply to individual workspaces, with a major new improvement for scaling across all workspaces. More on that below.
Account settings (My Profile)
Personal settings tied to individual users, which over time will personalize your profile and experience while providing improved workspace analytics.
Each user now has a My Profile page with the following fields:
Full name (editable)
Email address (associated with the account and not editable)
Job function (new)
Location (new)
Job function and location are defined by admins and selected by users from dropdowns. This enables subscriptions to better understand who is using Pencil and how.
Why This Matters
You can now distinguish between internal teams, agencies, contractors, or regions, even if everyone shares the same email domain, and use this data later to segment usage, generations, and exports in analytics and dashboards.
Apply Workspace Settings at Scale
Subscription admins can now apply workspace settings far more efficiently.
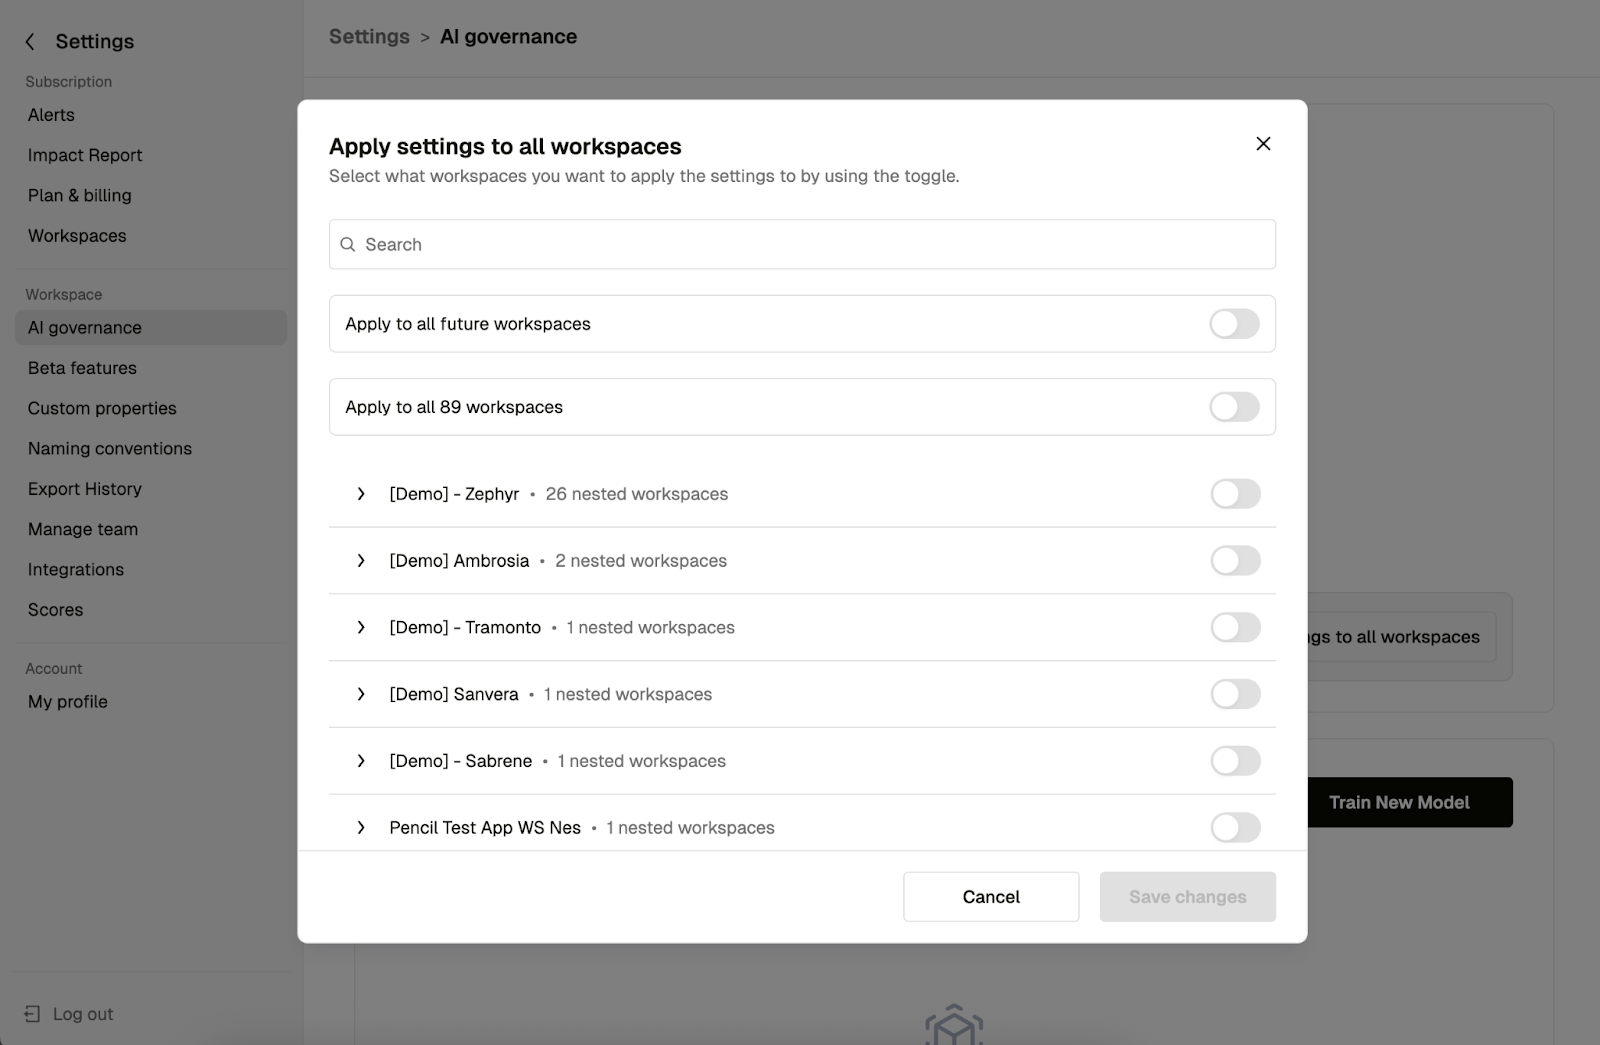
After configuring a setting on a workspace (e.g. AI Governance, beta features, custom properties, naming conventions, integrations, or scores), admins can choose to:
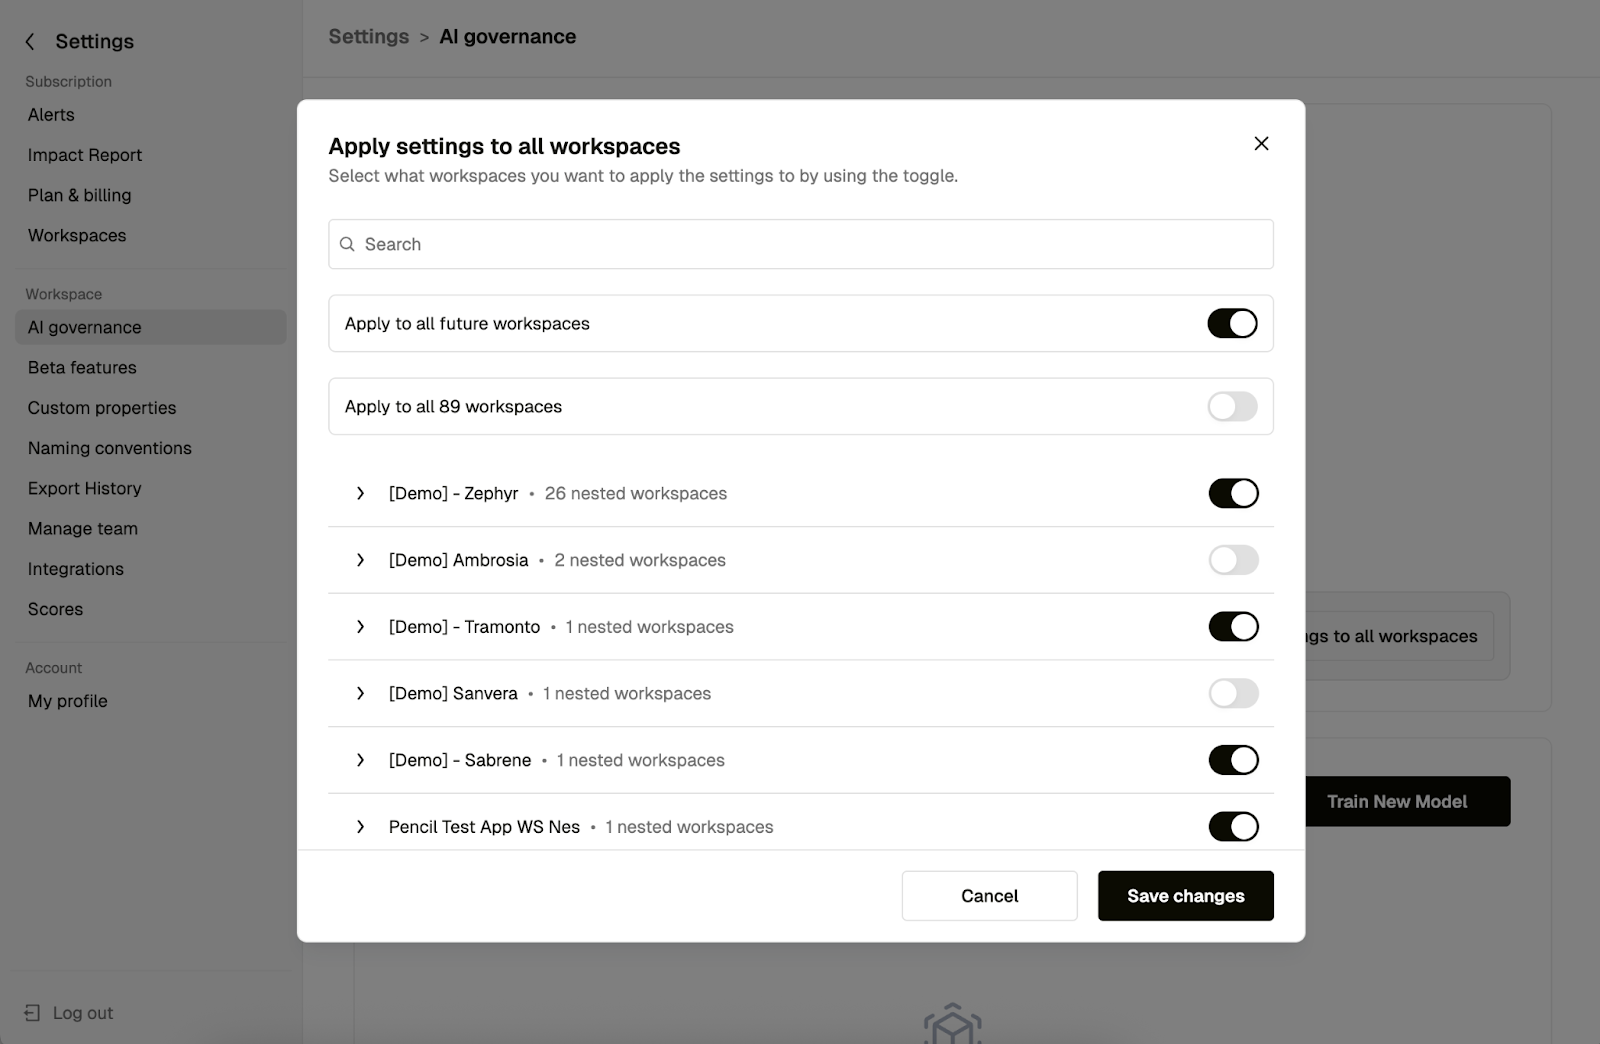
Apply settings to all workspaces
Apply settings to a selected subset of workspaces
Apply settings to all future workspaces
This applies across most workspace-level settings and makes it possible to set things once and keep settings consistently across an entire organization with multiple workspaces.
Why It Matters
Scale with confidence: Manage all of your workspaces without repetitive setup.
Stay consistent: Ensure setting for areas like AI governance, beta features, custom properties, naming conventions, integrations, and scores are aligned across workspaces.
Unlock better insights: New profile attributes enable richer analytics and clearer reporting by choosing job function and location on the profile page.
Save time: Set it once and apply it everywhere—including future workspaces.
How It Works
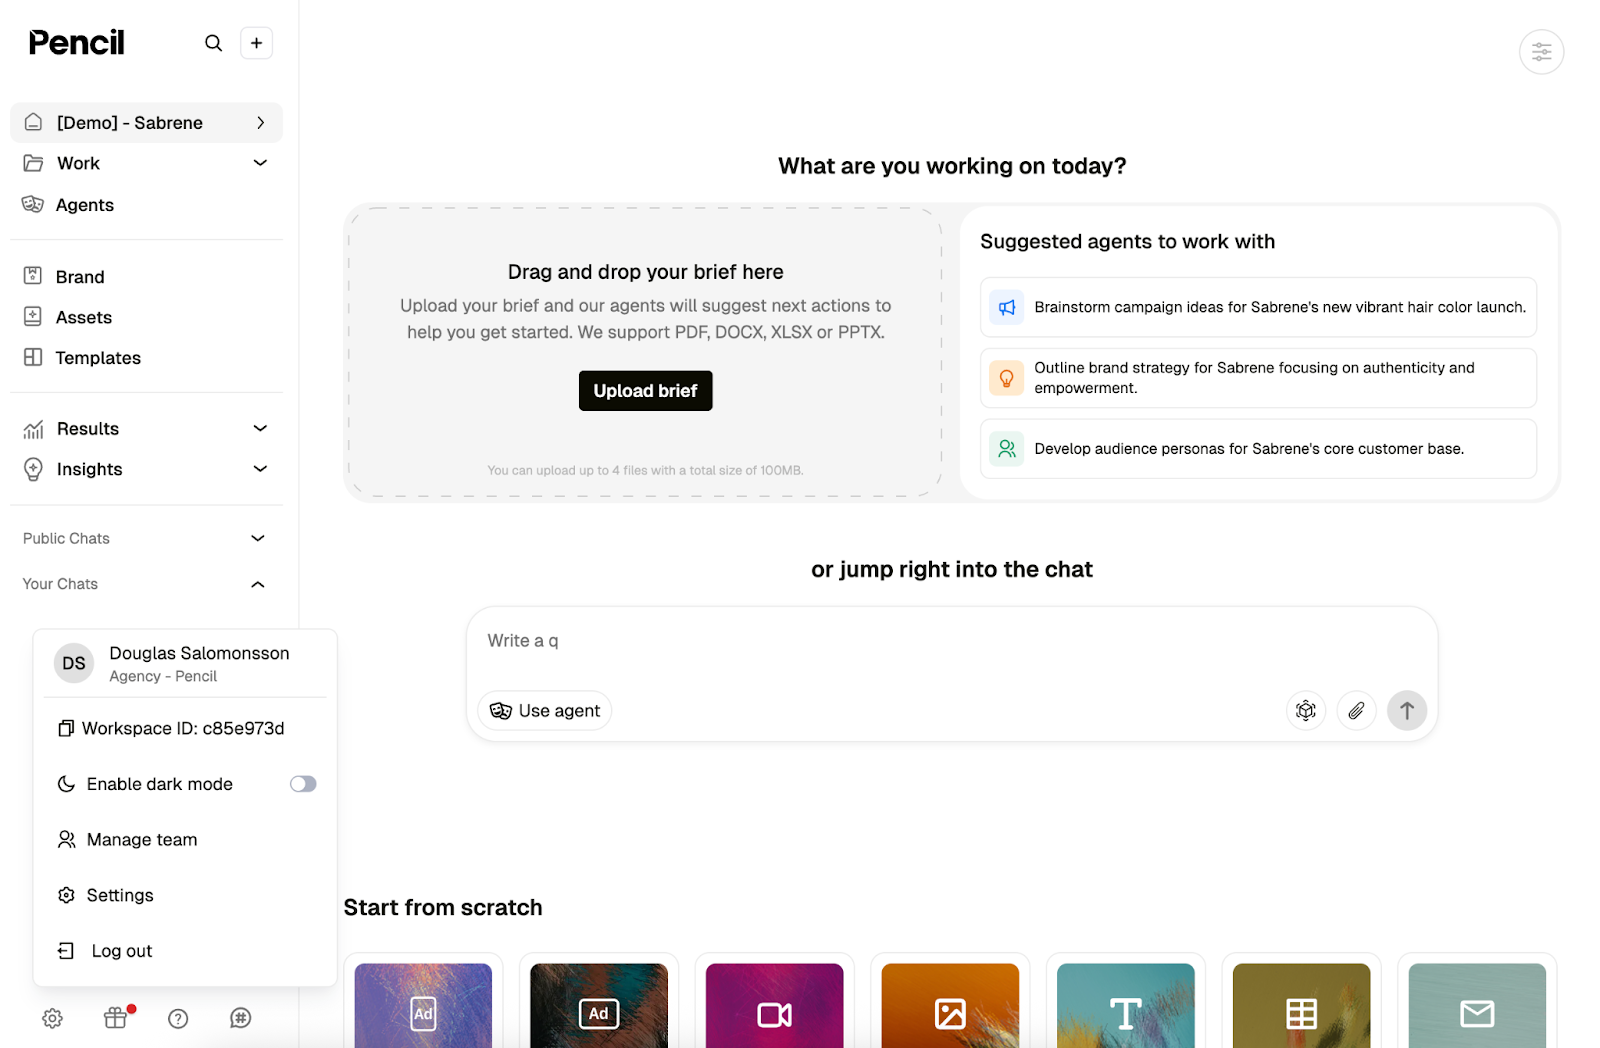
Step 1: Click the gear icon in the left-hand navigation to open the new settings menu. From here, you have quick access to Dark Mode, Manage Team, and Settings.
Step 2: Select Settings to open the full settings page. If you are a subscription admin, you will see three sections: Subscription, Workspace, and Account.
To apply settings across multiple workspaces, navigate to one of the following workspace-level settings pages:
AI Governance
Beta Features
Custom Properties
Naming Conventions
Integrations
Scores
After configuring your settings, use the Apply settings to all workspaces module to open a popup and choose where those settings should apply.
Click Apply the settings to all workspaces, selected workspaces, or future workspaces, then click Save changes to apply them.
Give it a try and manage your workspaces with ease!