Playbooks
May 1, 2026
Go Big or Go Home Screen
# Creative Workflows
Use it Like a Creative: Designing Beyond 16:9

Emma Wilson

Embee Joy Medrano
There's a moment in every creative brief where you read the specs and quietly think: okay, this is going to be interesting.
The requirement: macro-shot food visuals across three LED panels, each running at 3840x2160 pixels. That's 4K per panel. Three panels wide. One seamless canvas at 11,520 pixels across.
No AI video model in existence can natively animate at that resolution today. And while image models can get pretty big, they still fall short of what large-format LED screens demand when it comes to video output.
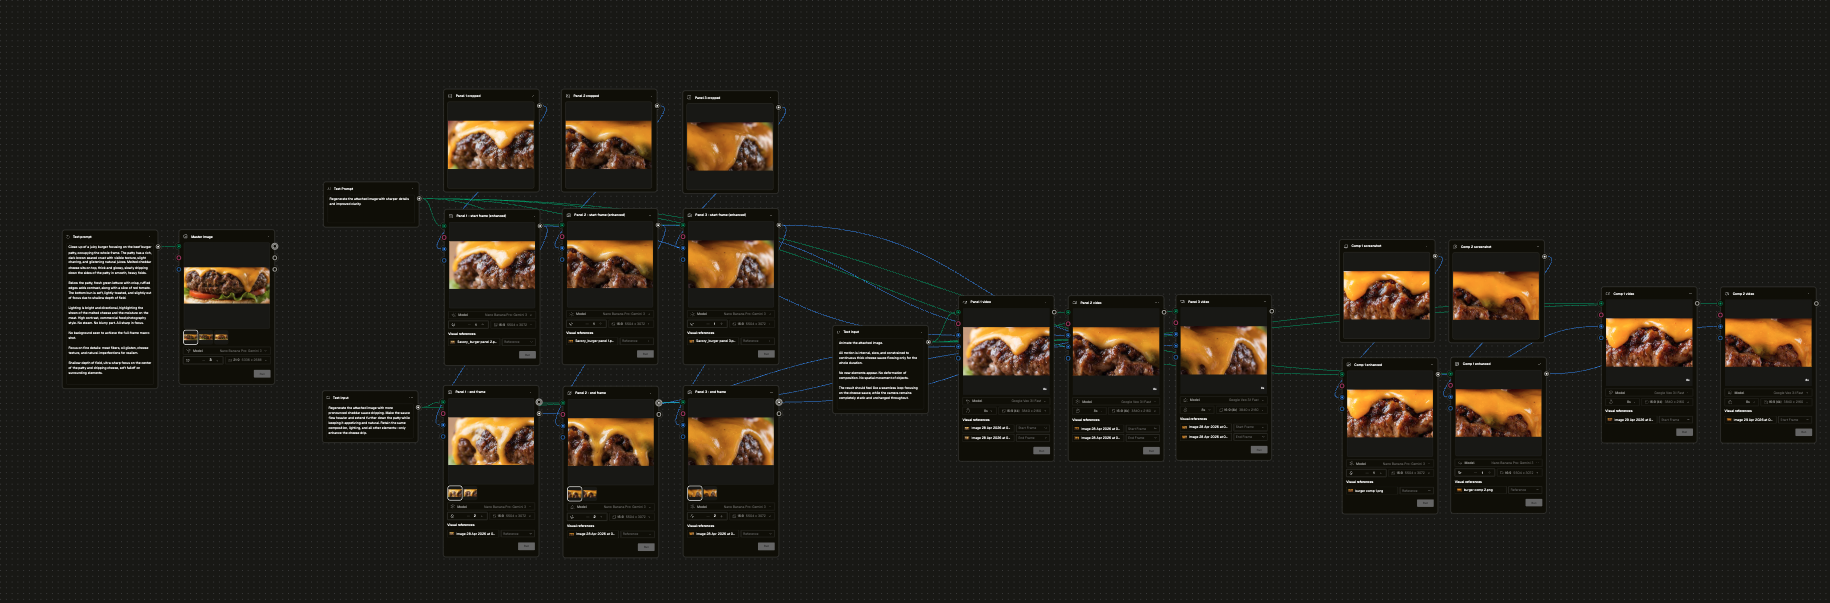
So the team built a workflow that didn't need them to.
The first instinct didn't work
The obvious approach was to generate one master asset, animate it into a video, and crop it across three panels. Clean logic. One source, guaranteed continuity.
Testing told a different story. Stretching a 4K video asset to fill a full multi-panel LED canvas caused significant quality loss. For macro food shots where texture and detail are the entire point, that wasn't going to fly. Which forced us to pivot...

The problem shifted. Instead of asking "how do we keep it seamless across panels," the question became "how do we keep it sharp at scale." That reframe is what the whole workflow is built around.
The workflow, step by step
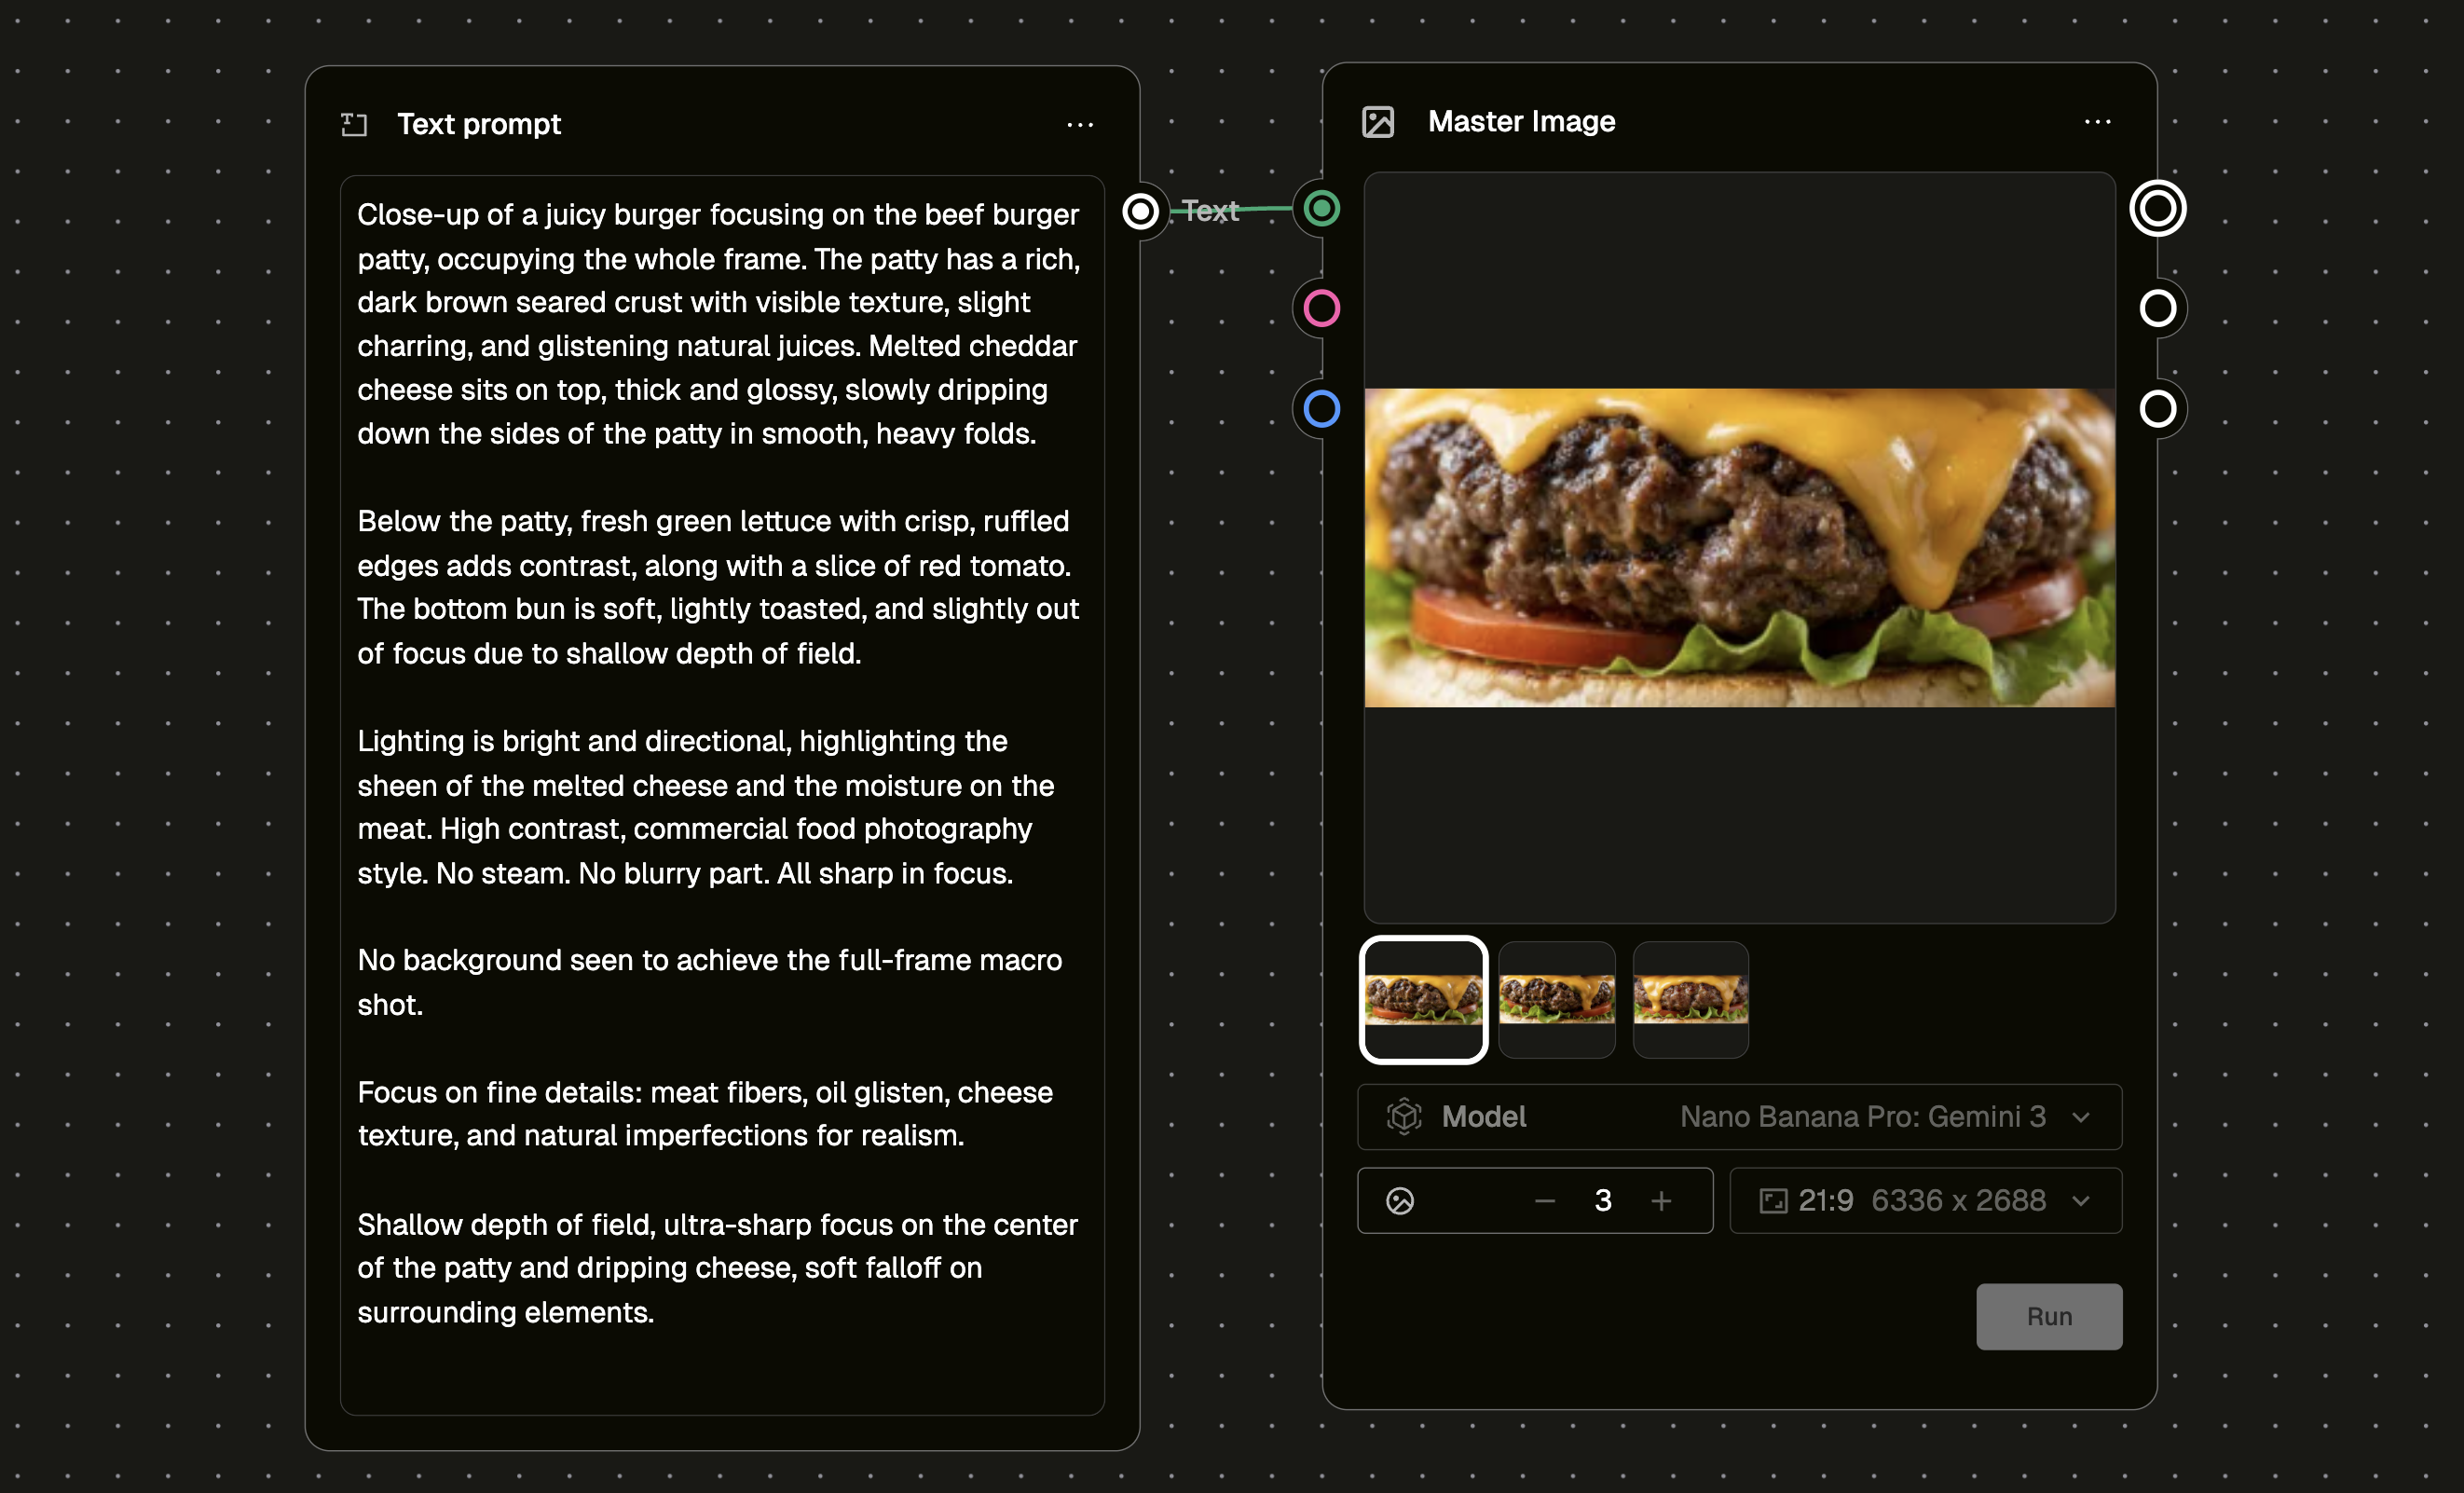
Step 1: Generate one master image at the highest resolution possible (21:9 format)
Everything starts here. One strong master image that defines the lighting, texture, colour tone, and composition. This is your source of truth. If it isn't right at this stage, nothing downstream fixes it.
The master was generated at 6336x2688 in 21:9 format using Nano Banana Pro. The prompt was highly detailed, specifying exactly what to show, how the food should be lit, and the level of texture and sharpness required.
Prompt used:
Close-up of a juicy burger focusing on the beef burger patty, occupying the whole frame. The patty has a rich, dark brown seared crust with visible texture, slight charring, and glistening natural juices. Melted cheddar cheese sits on top, thick and glossy, slowly dripping down the sides of the patty in smooth, heavy folds.
Below the patty, fresh green lettuce with crisp, ruffled edges adds contrast, along with a slice of red tomato. The bottom bun is soft, lightly toasted, and slightly out of focus due to shallow depth of field.
Lighting is bright and directional, highlighting the sheen of the melted cheese and the moisture on the meat. High contrast, commercial food photography style. No steam. All sharp in focus.
No background seen to achieve the full-frame macro shot. Focus on fine details: meat fibers, oil glisten, cheese texture, and natural imperfections for realism. Shallow depth of field, ultra-sharp focus on the center of the patty and dripping cheese, soft falloff on surrounding elements.
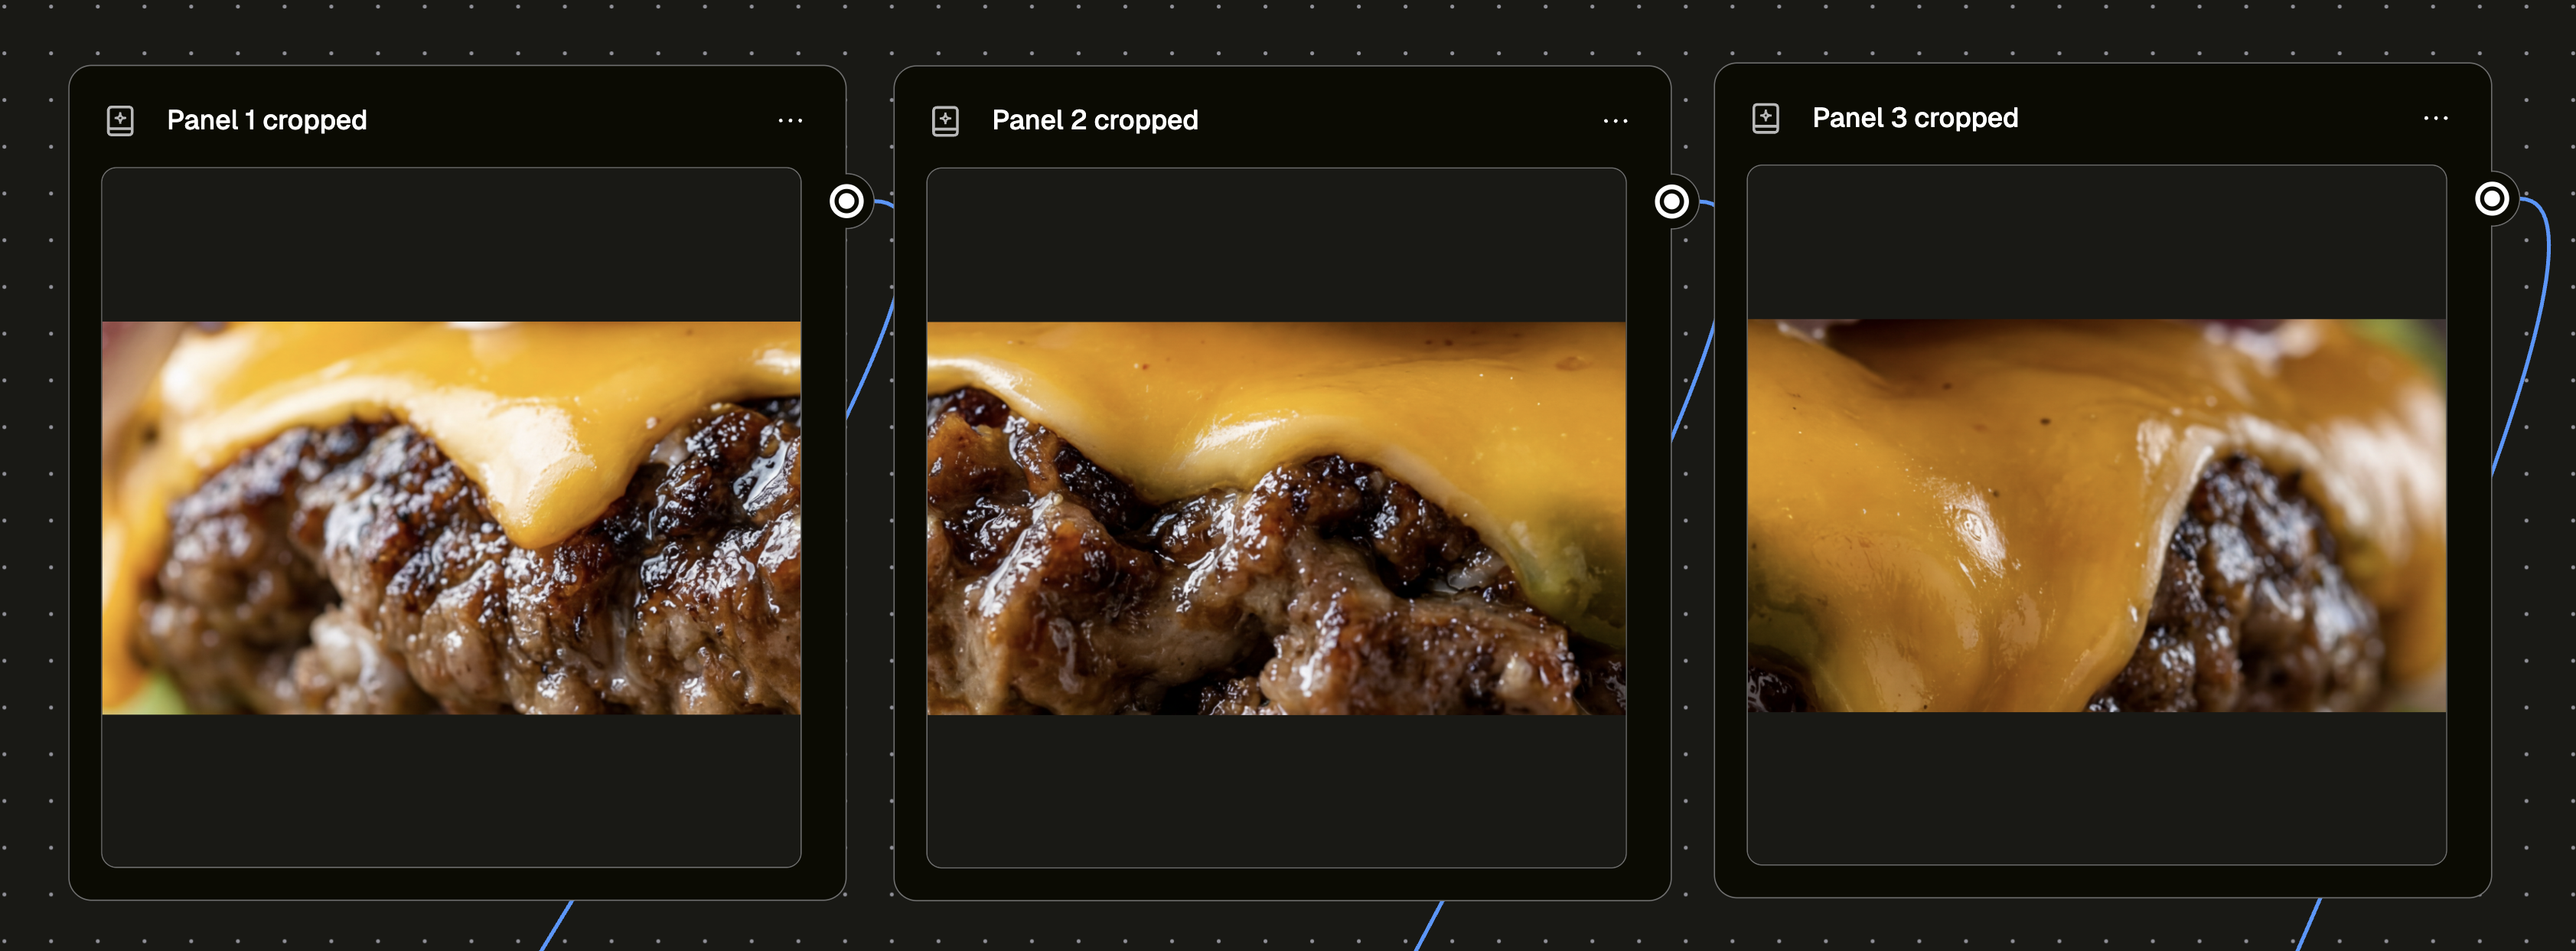
Step 2: Crop the master image into panels (16:9 per panel)
The master gets divided into three 16:9 sections, one per LED panel. You can crop using Photoshop or Illustrator for full control using guides. The goal is to divide a single image thoughtfully, not to create three separate designs.
Step 3: Upload each cropped panel and regenerate it at high resolution
Cropping can affect image quality and some detail may be lost in the process. To bring each panel as close as possible to its highest achievable quality before animating, each one is uploaded back into the workflow and regenerated at full 16:9 resolution (5504x3072).
The composition is preserved. The sharpness and detail are restored.
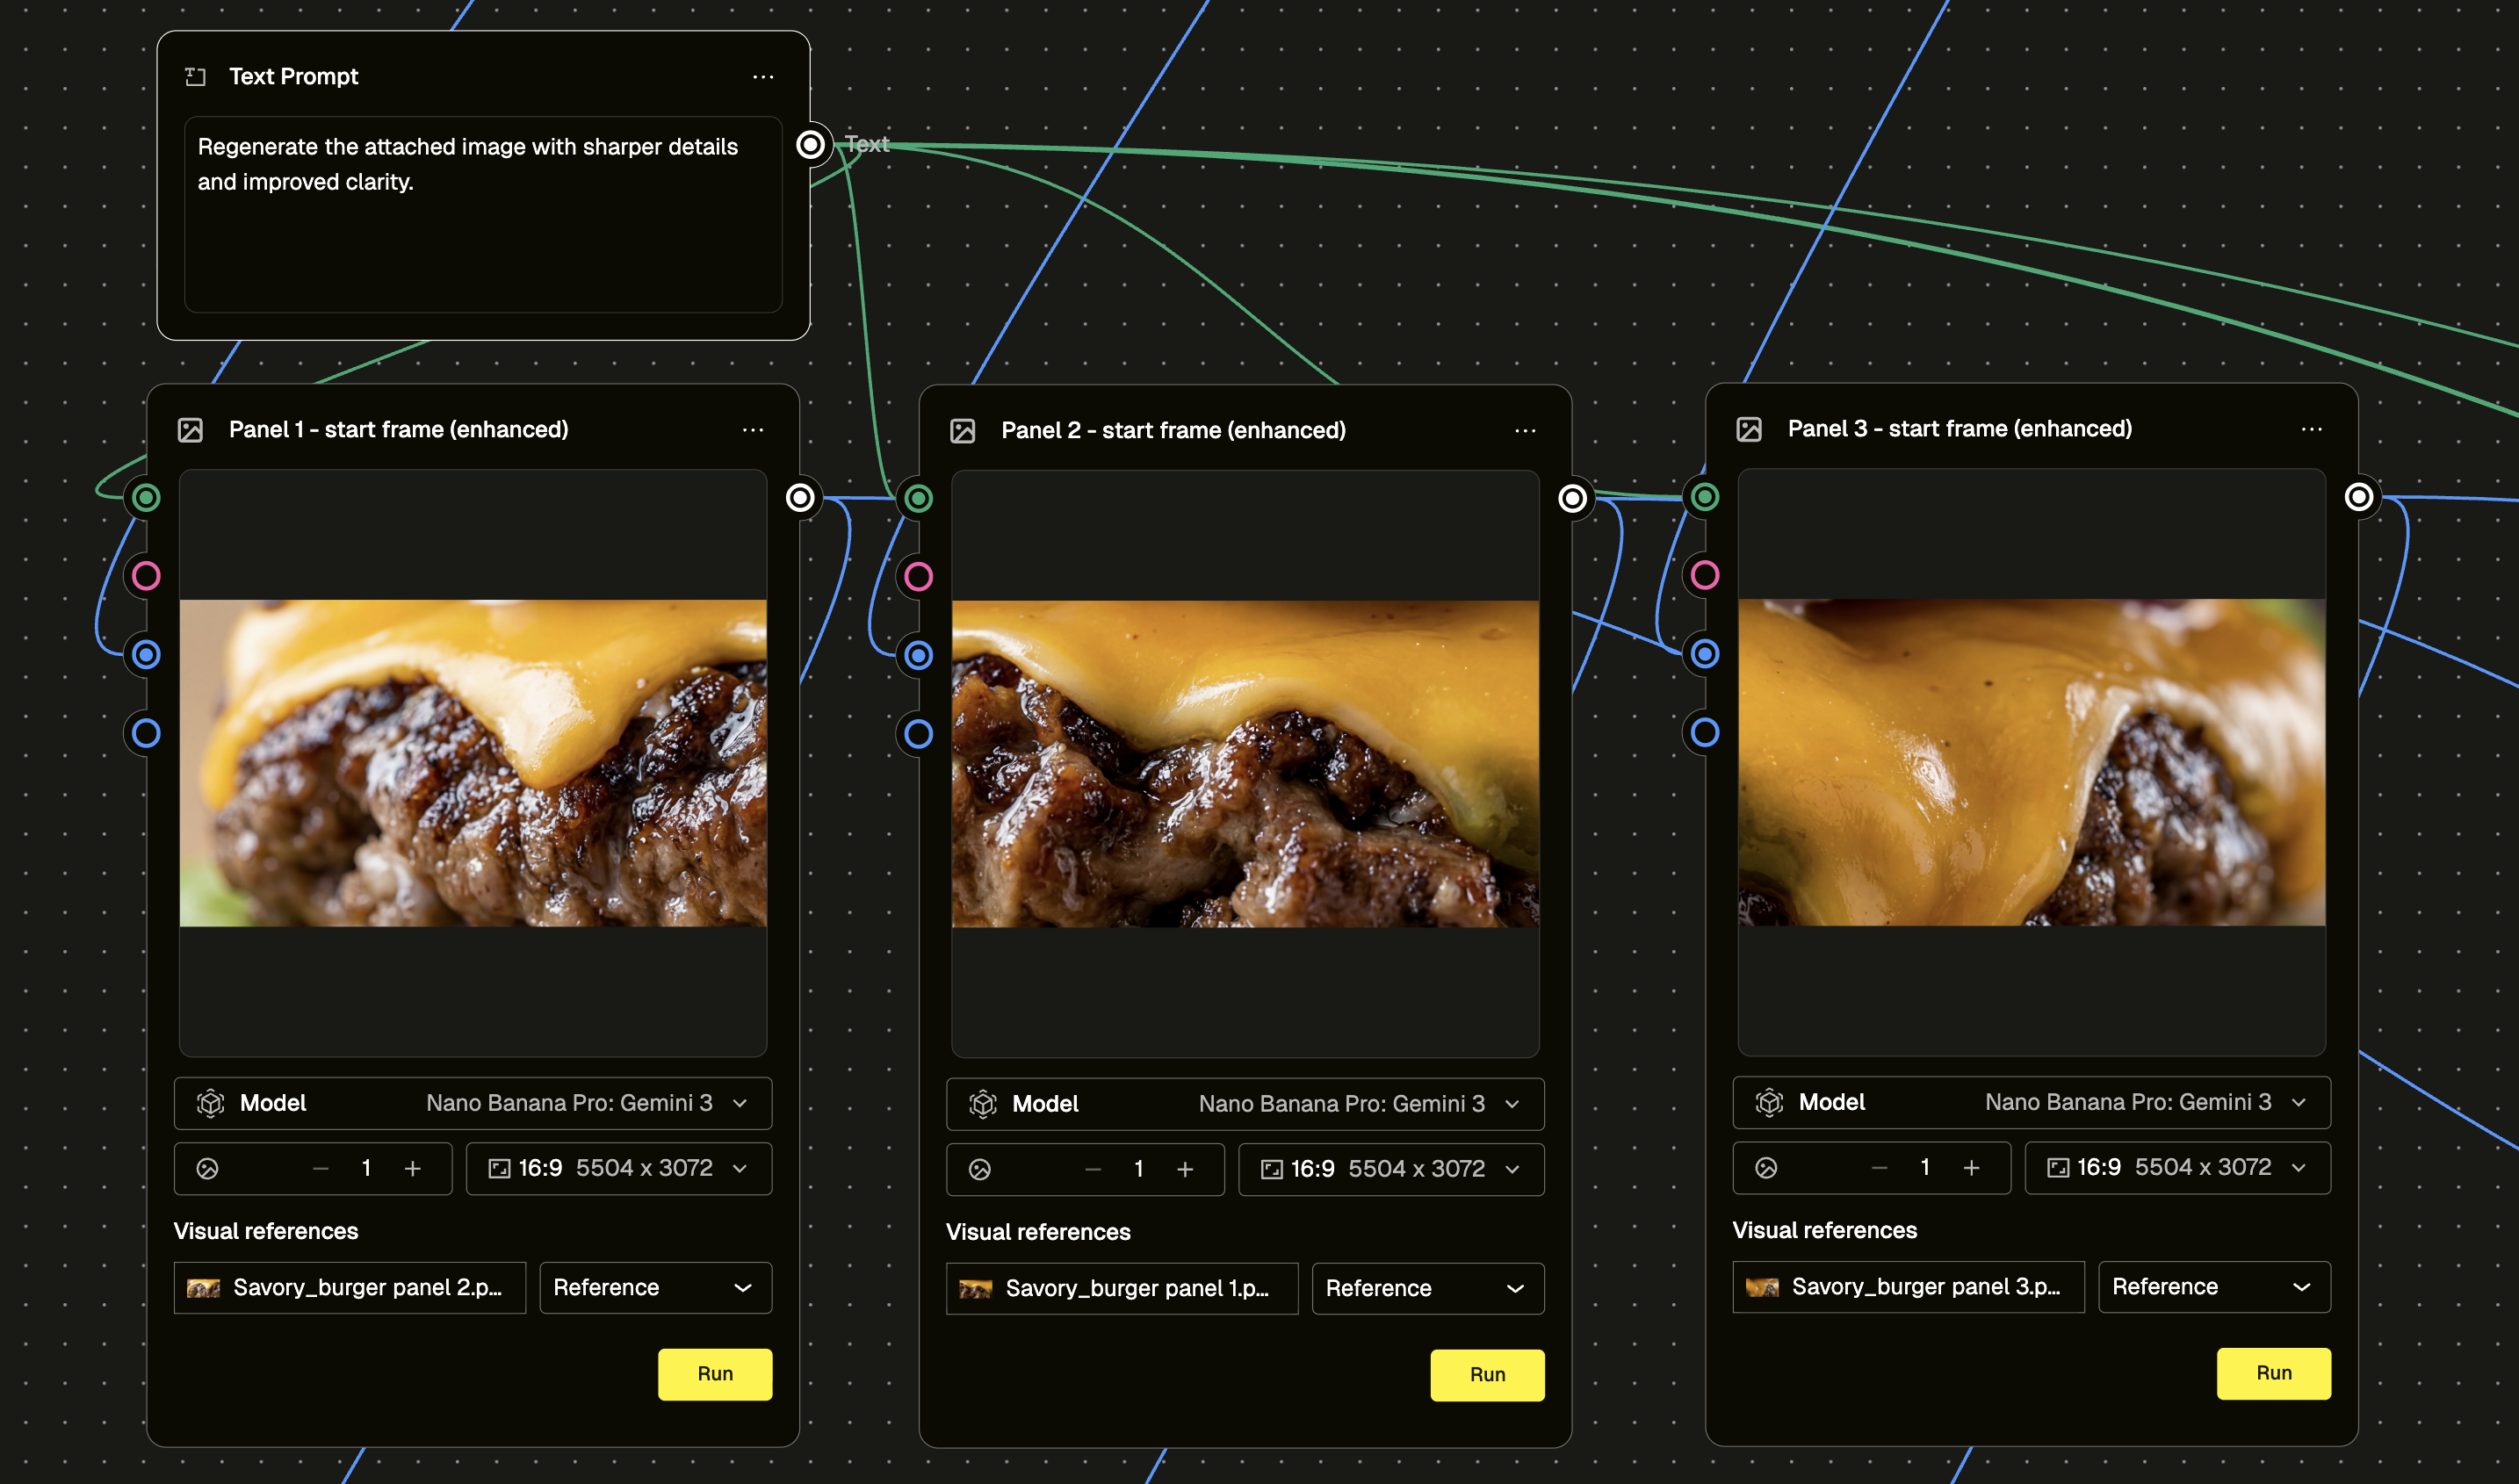
Prompt used:
Regenerate the attached image with sharper details and improved clarity.
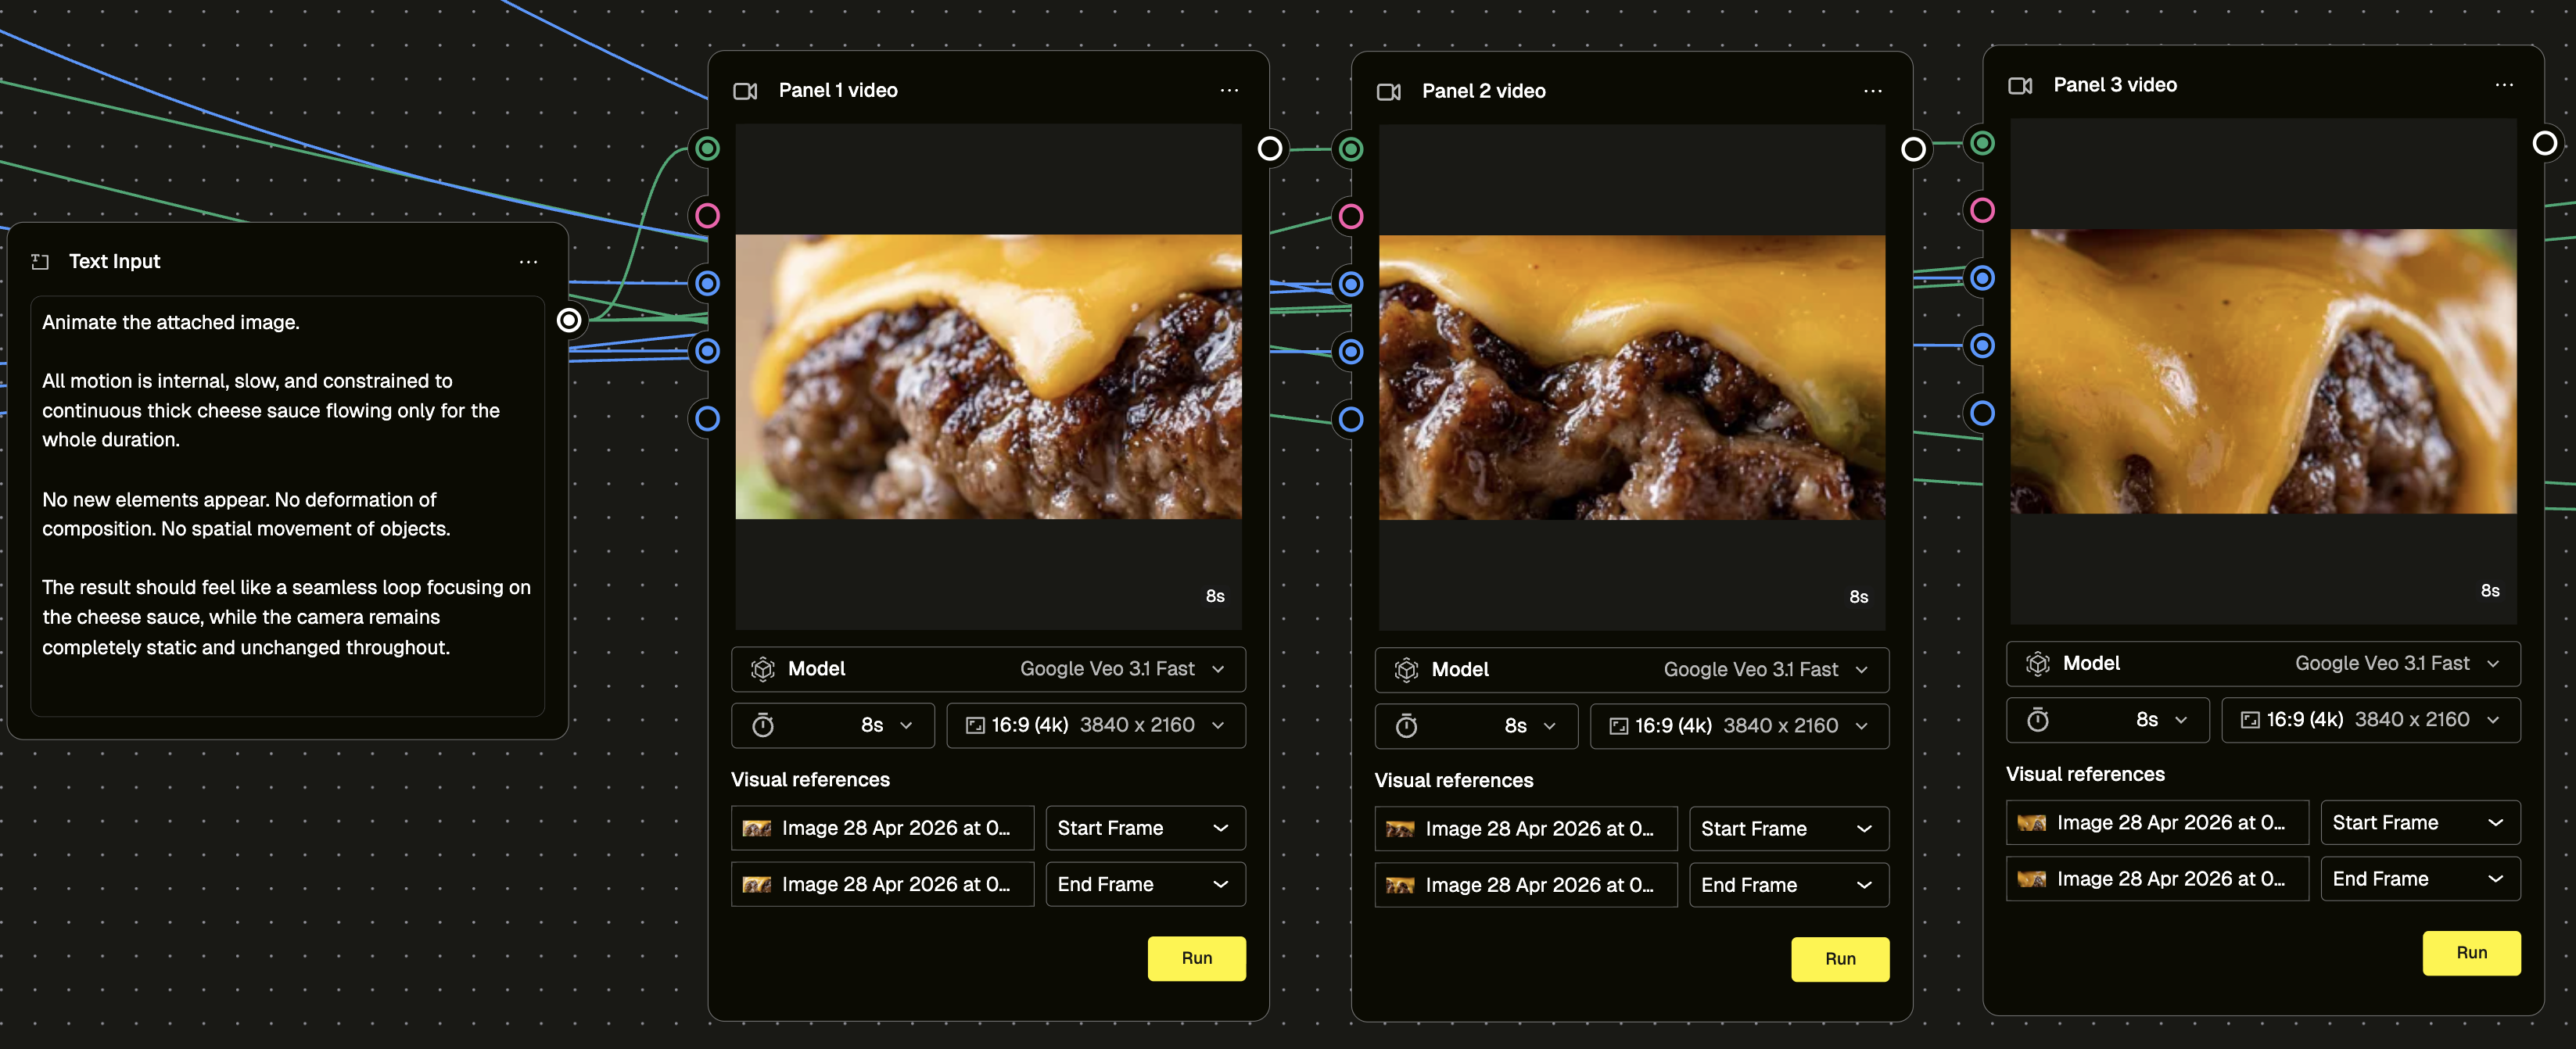
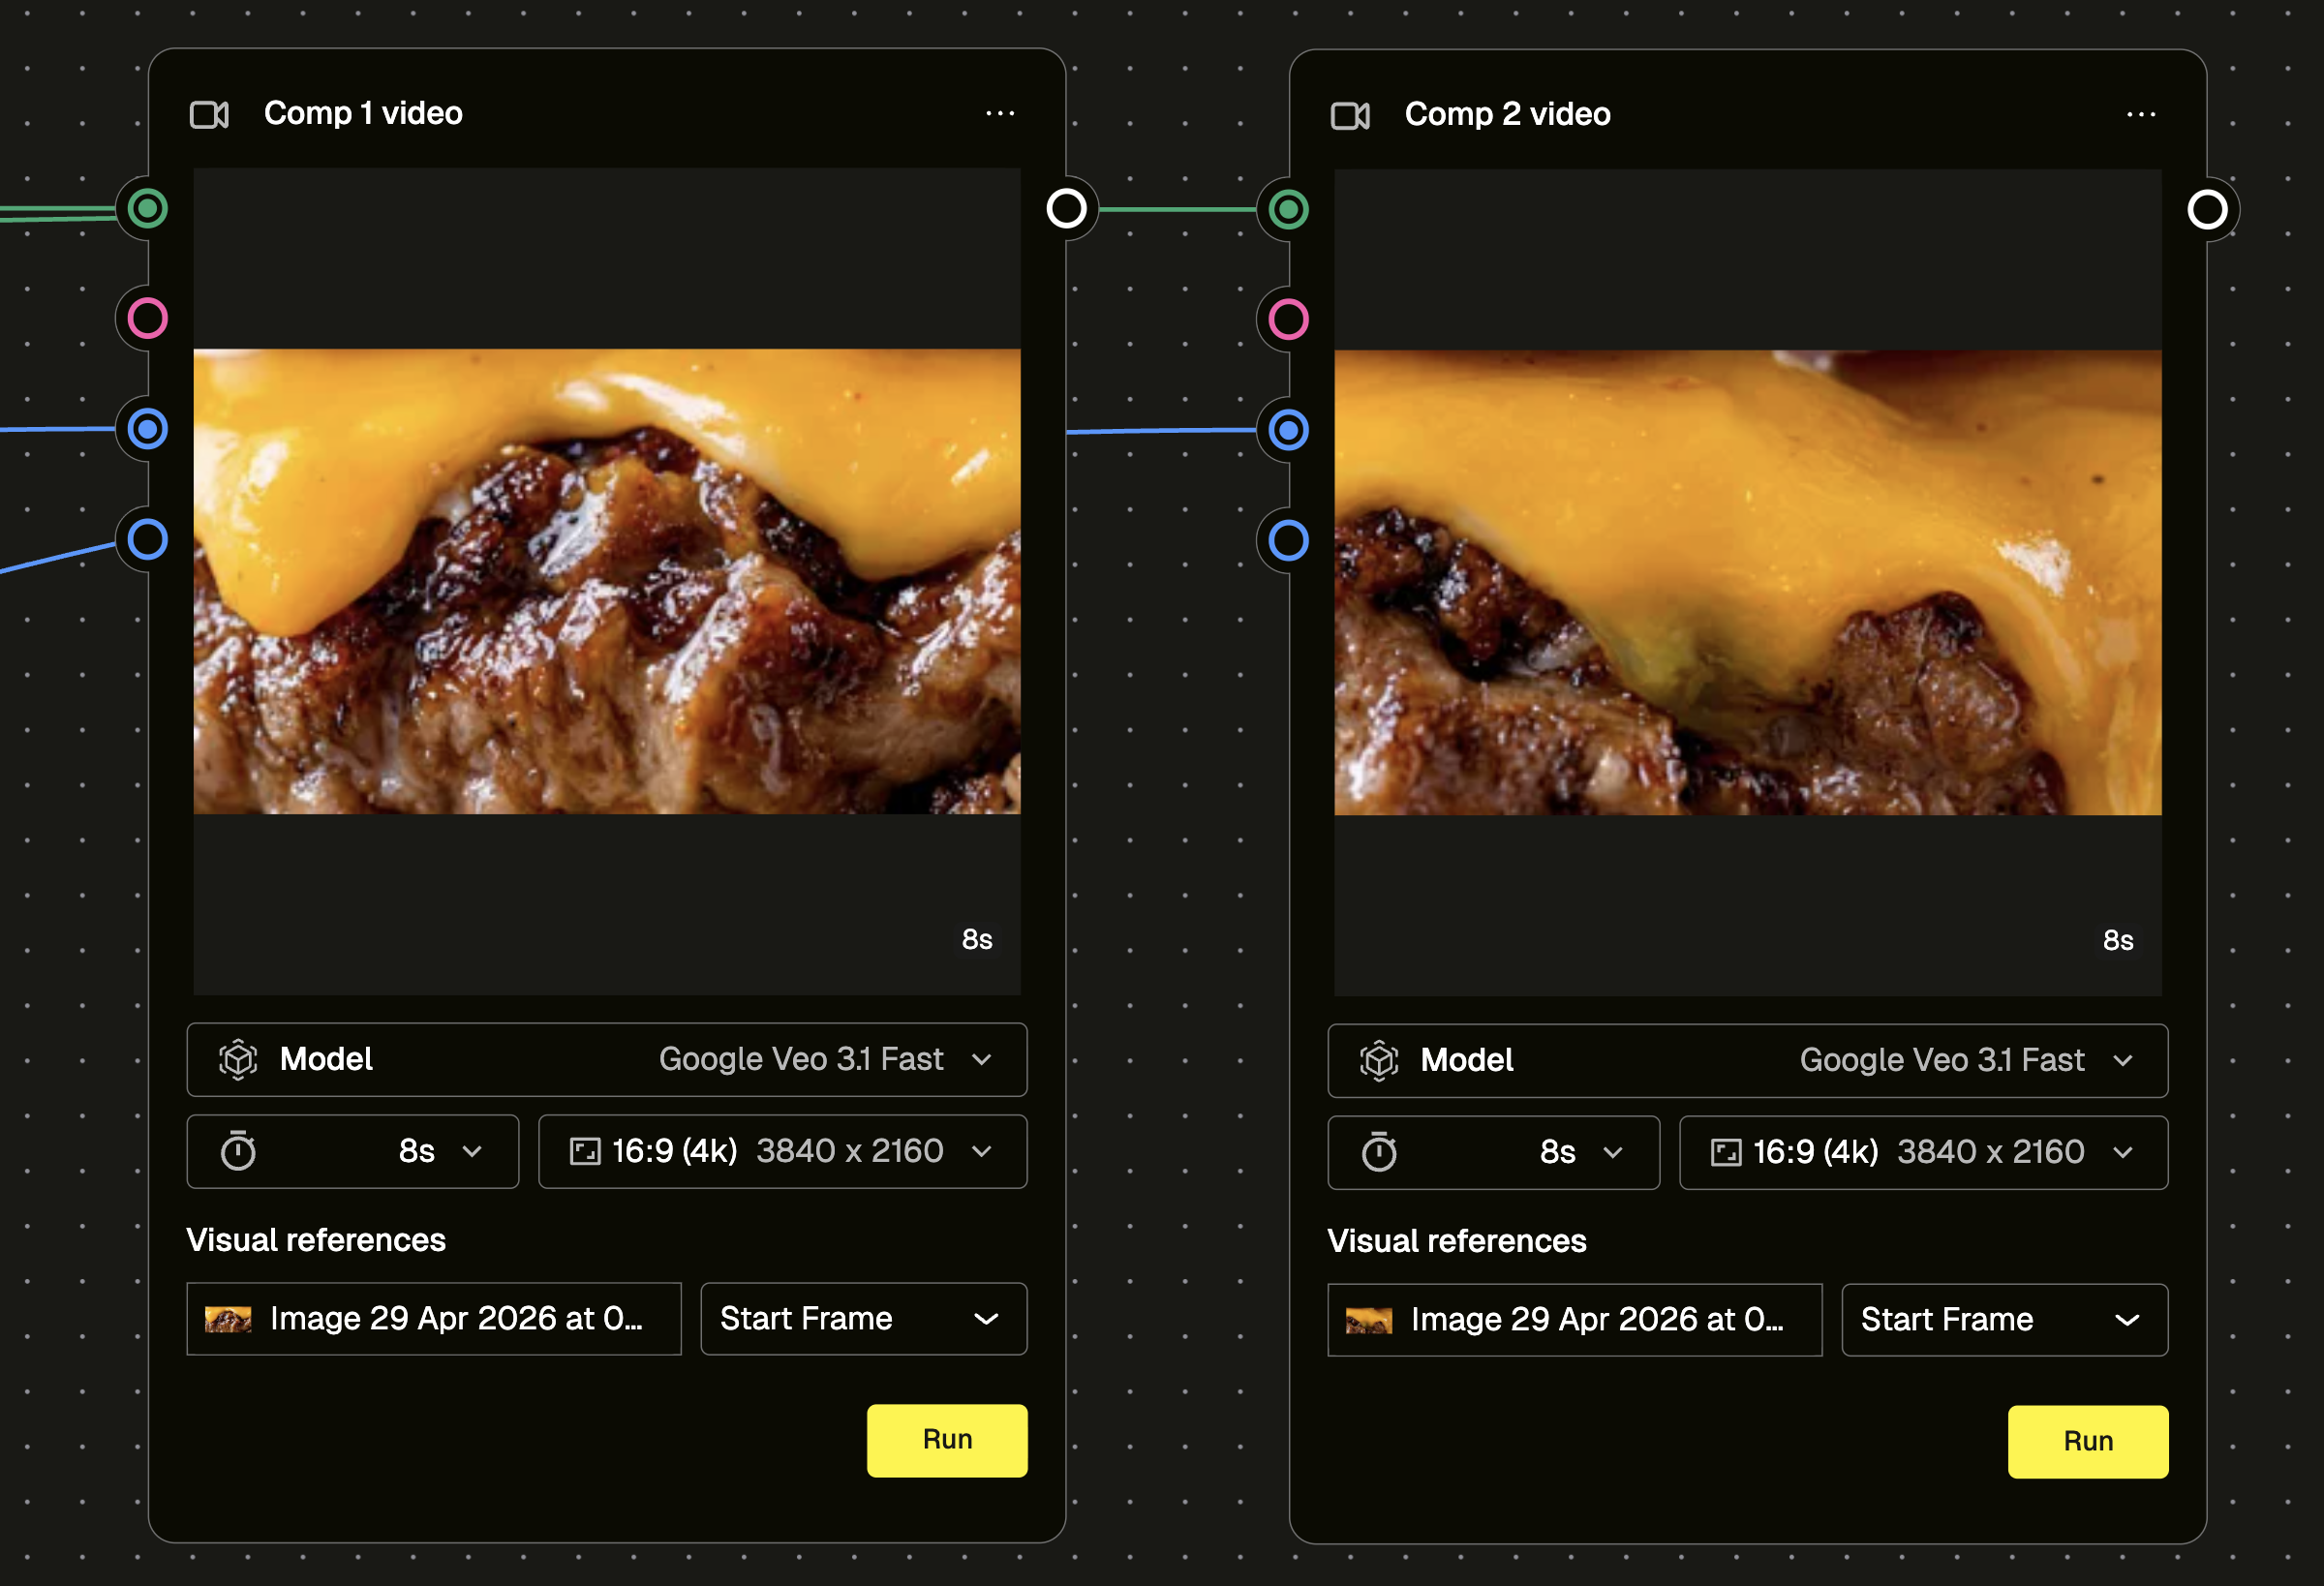
Step 4: Generate each panel into a 16:9 (4K) video
Each enhanced panel becomes a video. The key decision here is using both a start frame and an end frame for each panel, rather than a start frame alone.

End Frame Prompt used:
Regenerate the attached image with more pronounced cheddar sauce dripping. Make the sauce flow heavier and extend further down the patty while keeping it appetizing and natural. Retain the same composition, lighting, and all other elements—only enhance the cheese drip.
When you only use a start frame, AI video generation can still be unpredictable even when you specify motion in the prompt. Using an end frame gives you much more control over the output and means far fewer generation attempts to get something usable. In this case, end frames were generated showing more cheese flowing and dripping, then used alongside the start frames to produce the final video for each panel.
One prompt was used across all three panels to keep the motion behaviour consistent.
Prompt used:
Animate the attached image. All motion is internal, slow, and constrained to continuous thick cheese sauce flowing only for the whole duration. No new elements appear. No deformation of composition. No spatial movement of objects. The result should feel like a seamless loop focusing on the cheese sauce, while the camera remains completely static and unchanged throughout.
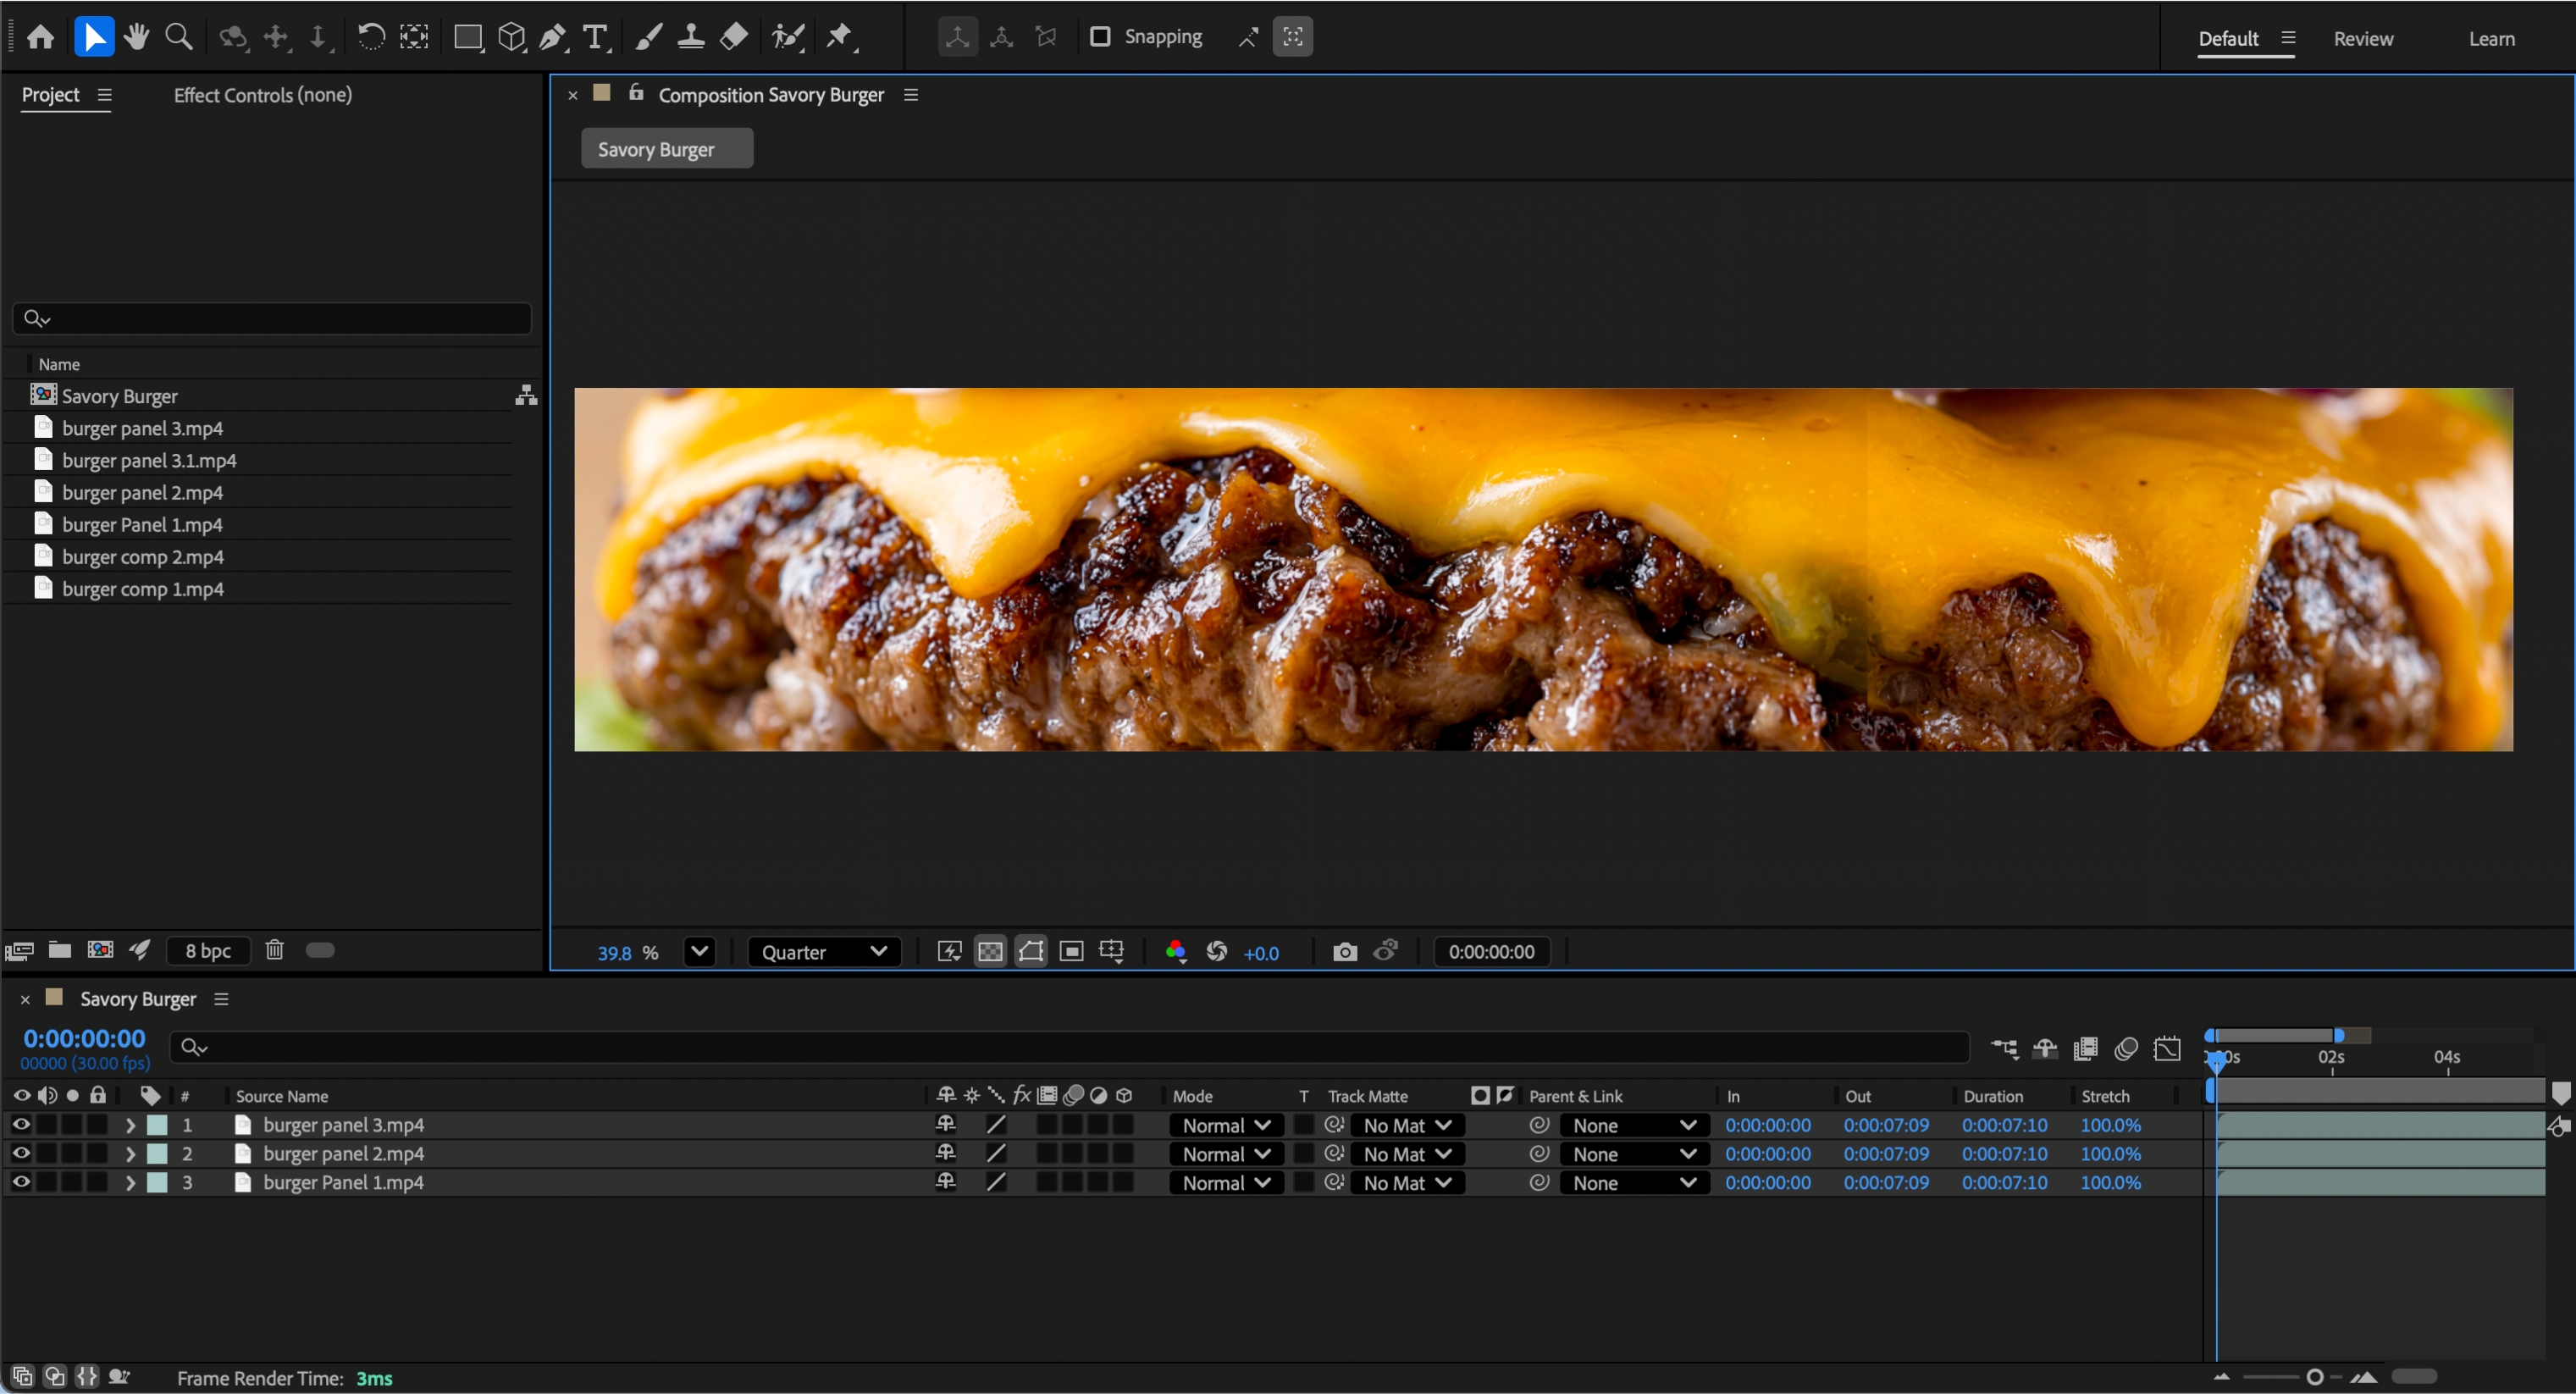
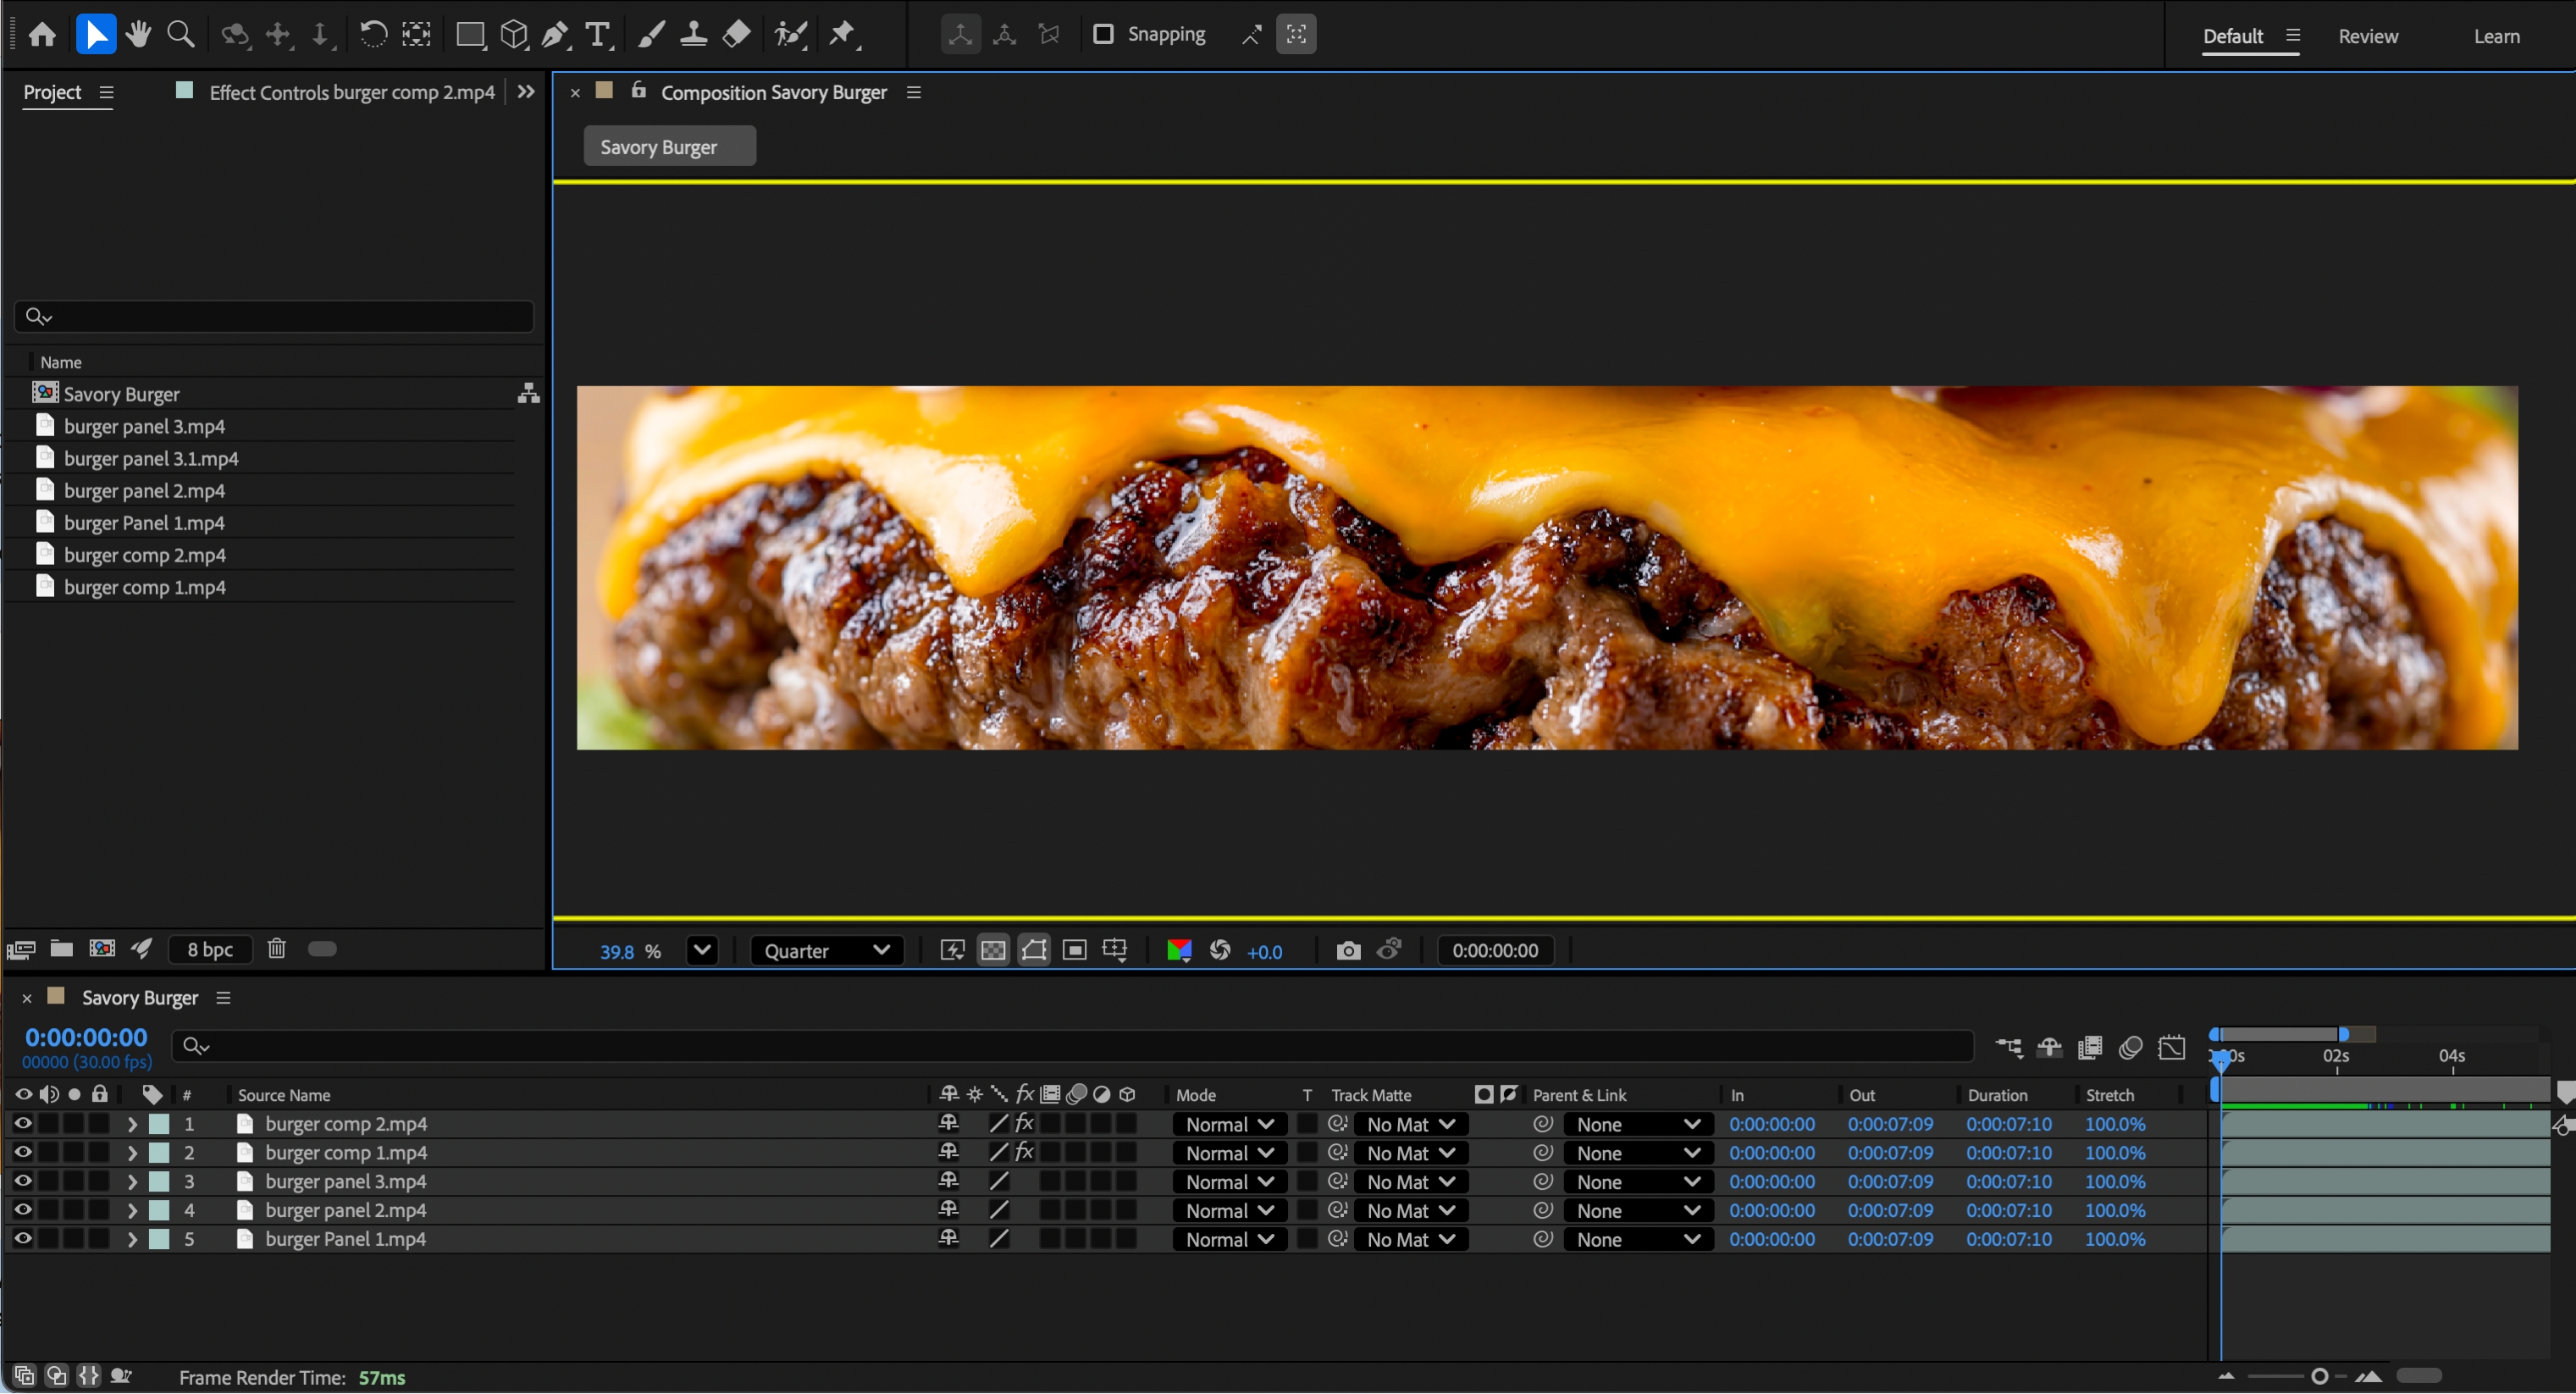
Step 5: Stitch all panels together in After Effects
The three video panels come together on a single canvas at 11,520x2160 pixels. This step currently requires After Effects because that canvas size exceeds what's supported on the Pencil platform (or any AI tool) today.
Each panel is 3840x2160, so the total width is simply 3840 multiplied by three. Height stays the same.
At this stage, visible seams between panels are expected. Even with a consistent prompt, AI video generation can produce slightly different motion at the edges of each panel. The next steps handle that.
Full canvas size: 11,520px x 2160px
Step 6: Fix the seams
Take a screenshot of each panel join. Clean up the seam in Photoshop, or regenerate the seam area using Pencil Image Gen to create a seamless composite image across the boundary.

Step 6.1: Once the seam is fixed, enhance the composite image in Pencil to restore sharpness and detail.
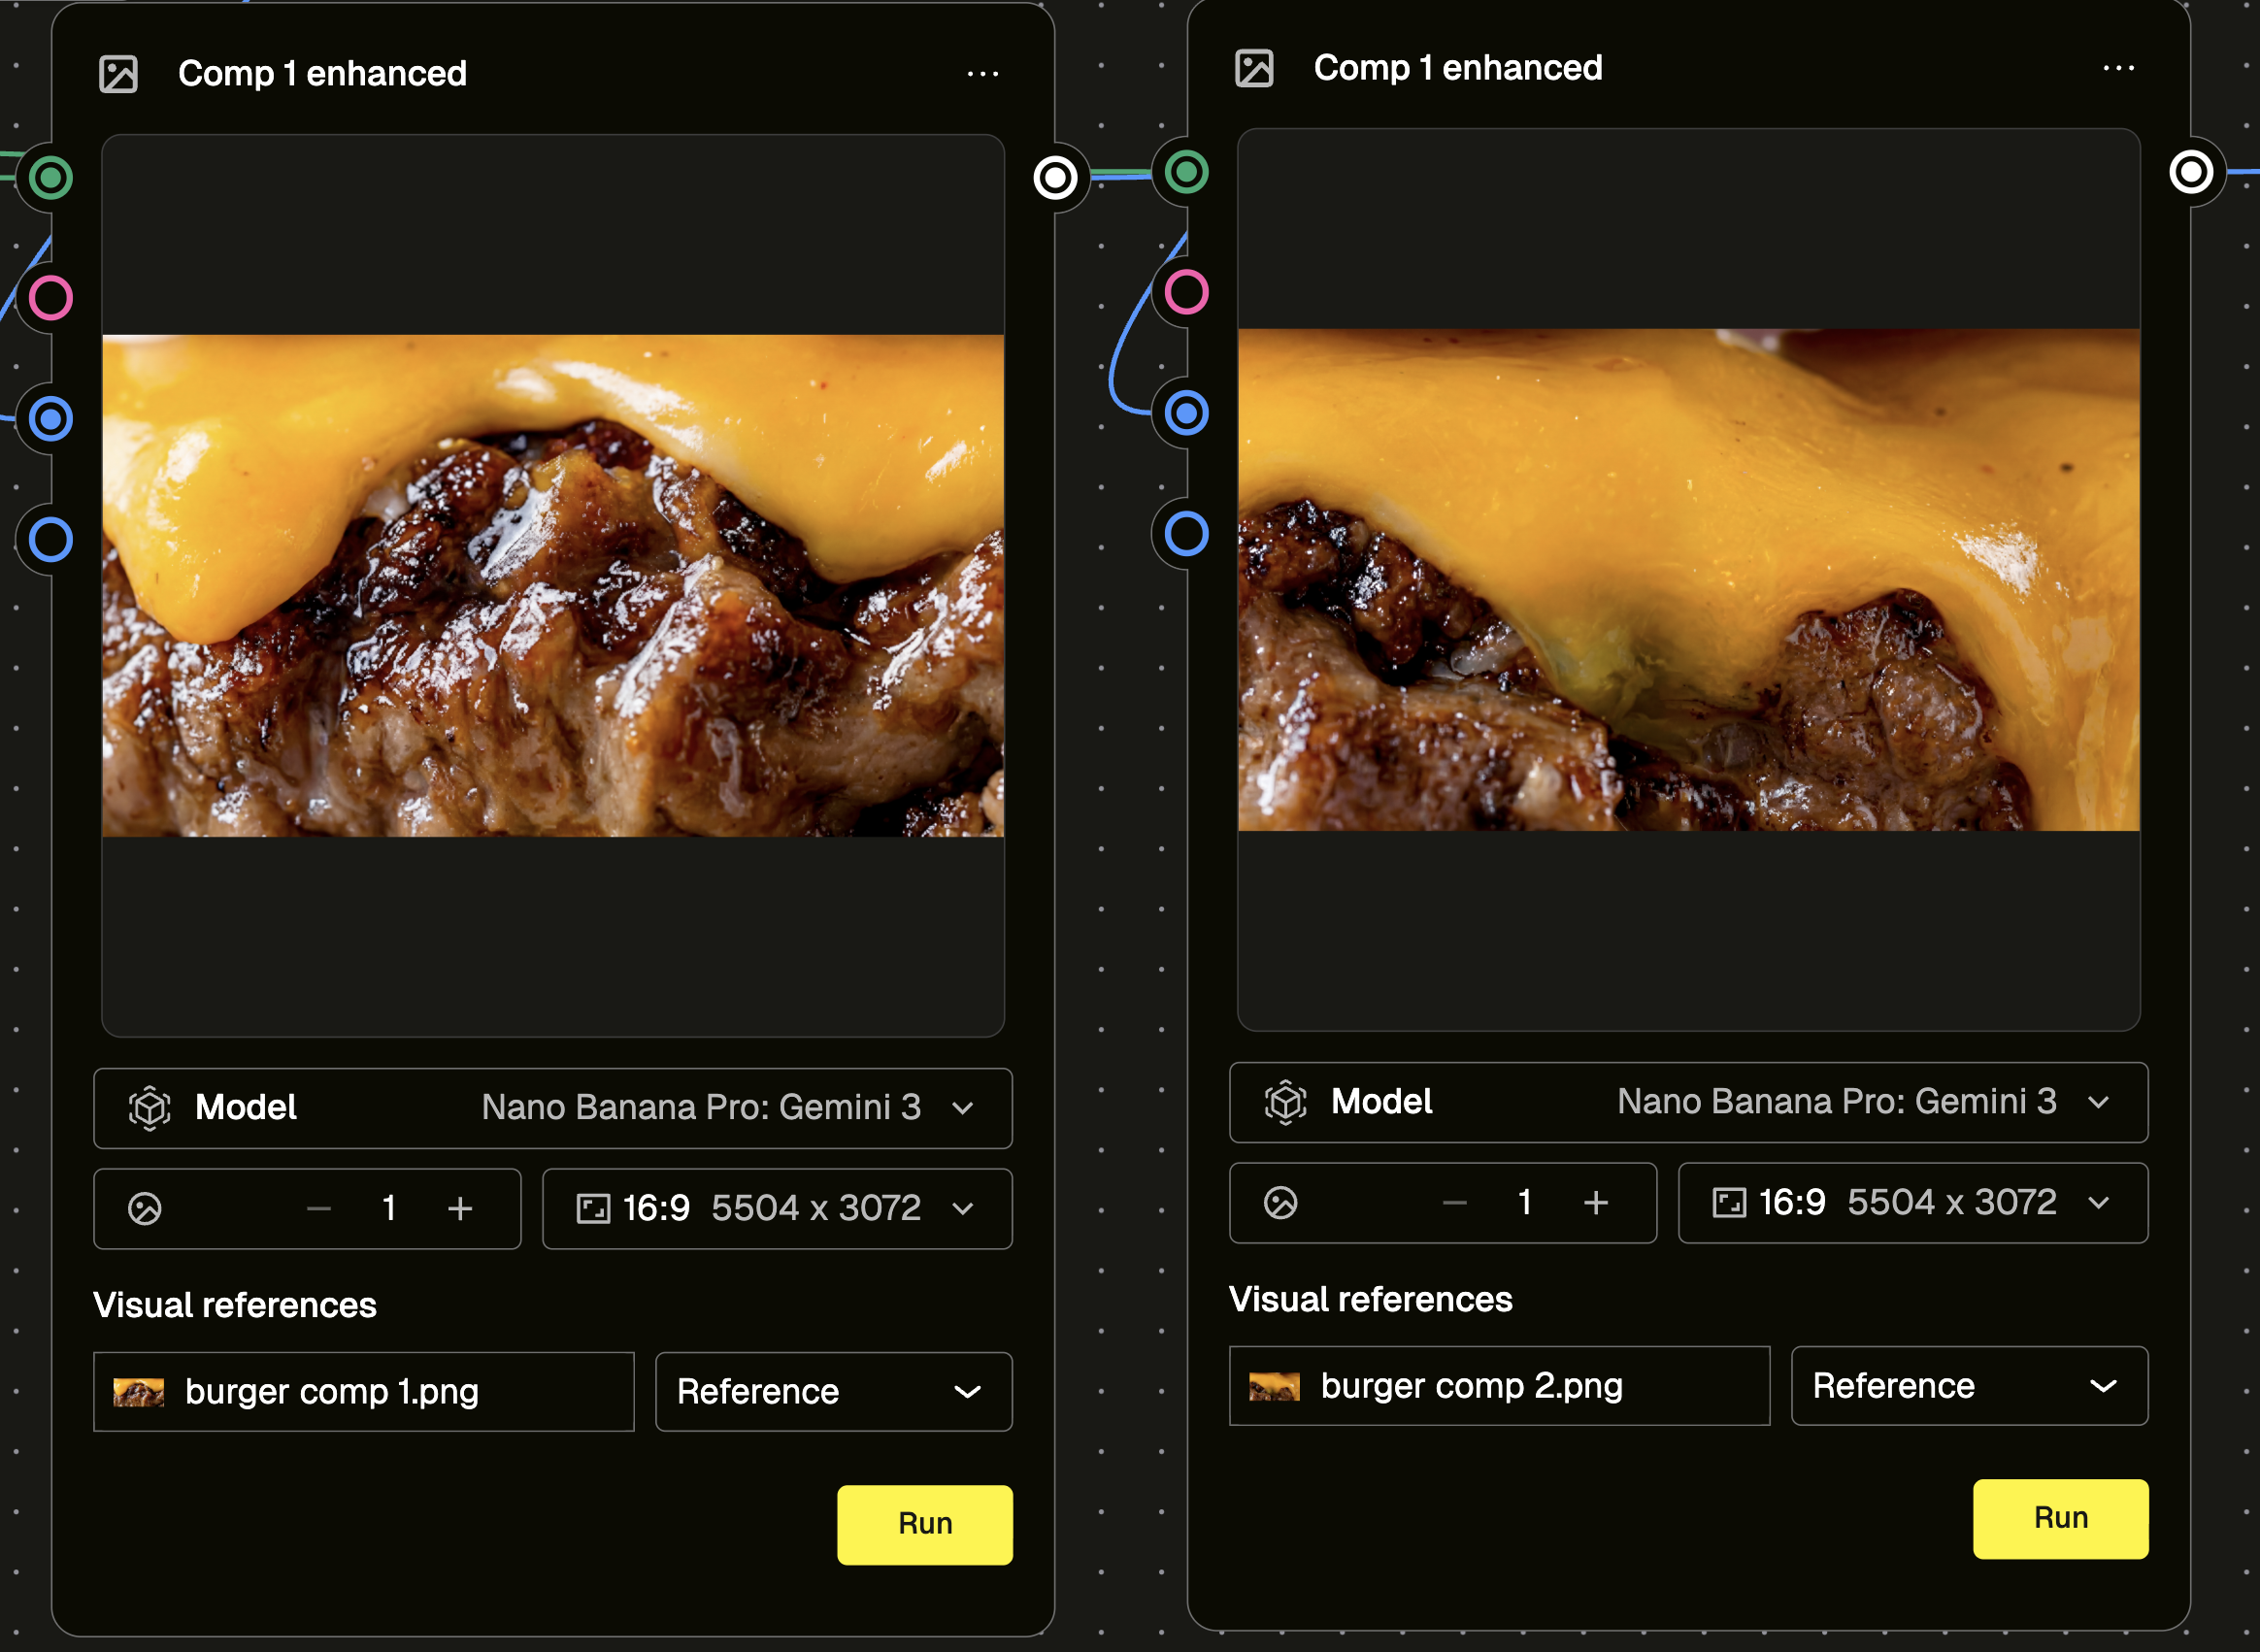
Prompt used:
Regenerate the attached image with sharper details and improved clarity.
Step 7: Use the fixed seam image as a start frame to generate a seam video
Generate a short video from each fixed seam composite using the same prompt as Step 4. If you're getting inconsistent results, use both a start and end frame for more control. The resulting video gets placed on top of the panel join in After Effects to hide the seam.
Prompt used:
Animate the attached image. All motion is internal, slow, and constrained to continuous thick cheese sauce flowing only for the whole duration. No new elements appear. No deformation of composition. No spatial movement of objects. The result should feel like a seamless loop focusing on the cheese sauce, while the camera remains completely static and unchanged throughout.
Step 8: Mask the seam videos over the joins in After Effects
The seam videos are placed as a layer on top of the panel videos, masked to cover just the join area. Adjust feathering, expansion, and if needed, tweak brightness, contrast, and saturation until everything blends.
The complexity of this step depends on the product. A burger with downward-dripping cheese is relatively forgiving. A video with unpredictable motion is harder to composite cleanly, which is exactly why the animation planning at the very start matters so much.
Total time for the full workflow: 2 to 3 hours.
The tip that changes how you approach the whole thing
Before you open any tool, think about the final output.
If you know you're building a macro shot across an LED wall, you already know the crop you need, you already know the motion that will work (something moving in one direction, like a downward drip, composites far more cleanly than something unpredictable), and you already know what your end frame needs to look like.
That thinking takes five minutes. What it saves is hours.
Think about the crop first: what's the best part of the product to show for a macro shot? Then think about the animation: what motion will work across all panels so that when they're stitched together, it still reads as one canvas? Once you can answer both, you can generate your master asset knowing exactly what the final output needs to look like.
Execution difficulty does vary. More complex product visuals will typically need more iterations to maintain quality and seamless output across panels. But starting with the end in mind dramatically reduces how many of those iterations you'll need.
What this workflow is actually for
This workflow is designed for one specific thing: a continuous, full-canvas video asset that spans multiple LED panels and plays as a single unified visual.
If you're building layout-based ads with headlines, logos, and CTAs, this approach doesn't apply. Design directly to your LED resolution and treat panels as intentional layout zones rather than sections of one image.
For static assets, the process is simpler (master image, crop, clean up the seams) but seam awareness still matters even without motion to manage.
The bigger picture
AI tools are evolving constantly, and limitations that exist now may not exist for long. What doesn't change is the underlying principle: when the tool can't do exactly what the brief requires, you adapt the workflow and build in parts.
That's what this workflow is. Not a workaround. A method.
The full step-by-step process, every prompt, and the source files are available in the Pencil community.
Download the assets below>>>
Sign in or Join the community
Surprising you with what creativity can do...

Create an account
Surprising you with what creativity can do...
Like
Comments (0)
Popular

Dive in
Related
Blog
Can AI be green? On power, planet, and the purpose of what we make.
By Laura Cecilli • Apr 22nd, 2026 • Views 37
Blog
Can AI be green? On power, planet, and the purpose of what we make.
By Laura Cecilli • Apr 22nd, 2026 • Views 37